20 November 2024 • 9 months ago
How to Add a Vendor on the Seller Portal
Category : Inventory Management
Step 1: Log in to the Seller Portal
- Go to the Seller Portal login page and log in with your credentials.
- After logging in, you will be redirected to the Dashboard.
Step 2: Navigate to the Vendor Section
- In the Dashboard, locate the Vendor section from the navigation menu.
- Click on the Vendor section to manage your vendors.

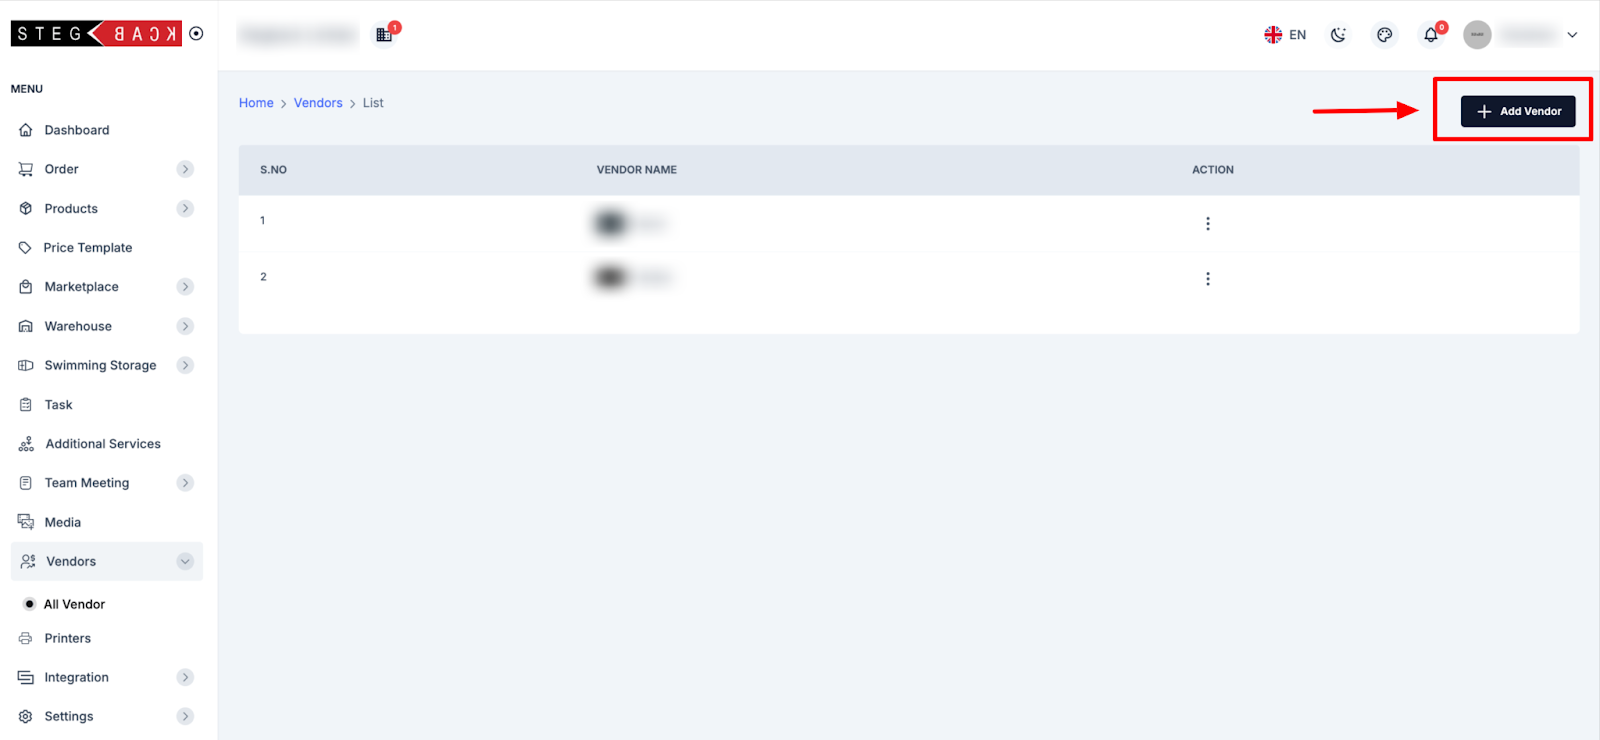
Step 3: Click on "Add Vendor"
- Once you're in the Vendor section, click on the Add Vendor button to start adding a new vendor.
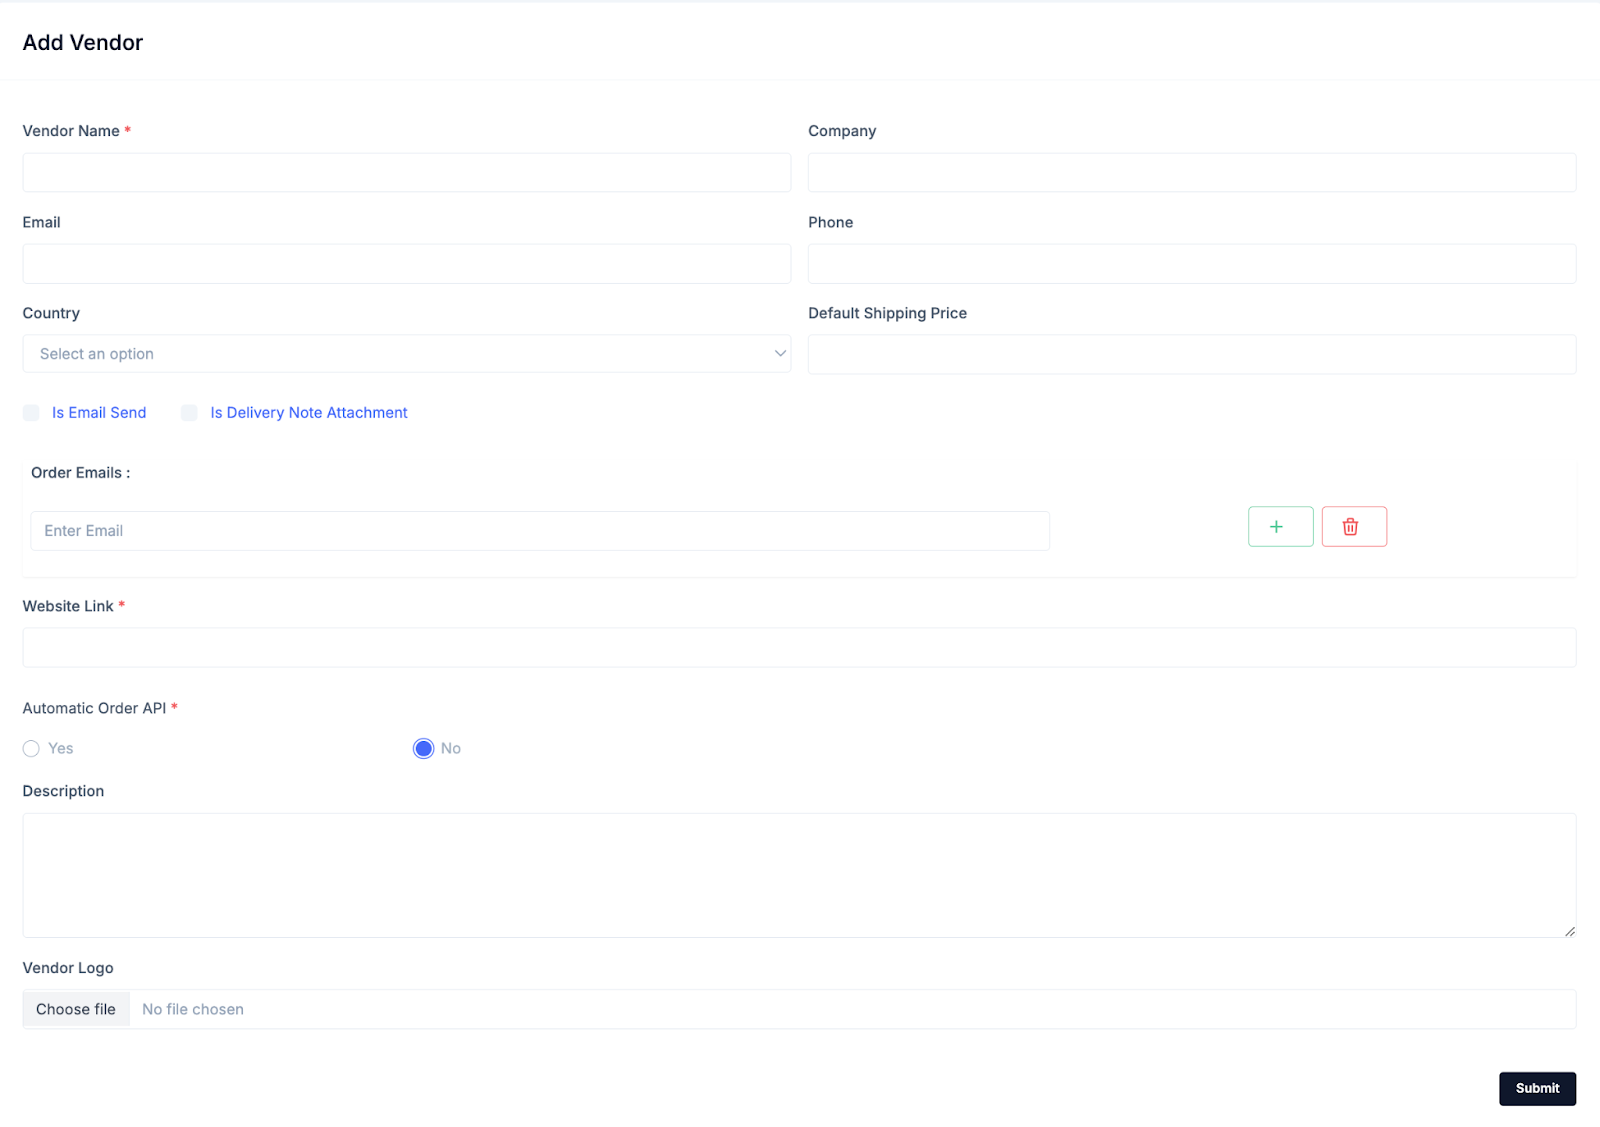
Step 4: Fill in the Required Details
- Complete all the required fields as shown in the image:
- Vendor Name: Enter the name of the vendor.
- Company: Enter the company name.
- Email: Enter the vendor's email address.
- Country: Select the vendor's country from the dropdown menu.
- Is Email Send: Toggle this option if you want to send an email to the vendor.
- Is Delivery Note Attachment: Toggle if you want to attach delivery notes automatically.
- Order Emails: This section should be filled in with the email addresses that will receive notifications when an order is delivered. Enter the emails of the recipients who should receive delivery notifications.
- Phone: Provide the vendor’s contact phone number.
- Website Link: Provide the vendor's website URL.
- Automatic Order API: Select Yes or No based on whether the vendor has an automatic order API.
- Description: Add a brief description of the vendor.
- Vendor Logo: Upload the vendor's logo by clicking the "Choose file" button.
Step 5: Submit the Vendor Details
- After filling out all the required details, click the Submit button to save the vendor information.
- Once you submit the form, you will be redirected to the vendor listing page.
- Your newly created vendor will appear in the list of vendors.
Recent Articles
-
6 months ago
-
6 months ago
-
6 months ago
-
6 months ago
-
6 months ago