Publish by : admin user
07 January 2025 • 4 months ago
How to Create Label for an Order
Category : Logistics & Shipment
What is a Label?
A label is a document generated for shipping purposes that contains essential information about the shipment, such as sender and receiver details, weight, dimensions, and shipping service. It is attached to the package to ensure proper handling and delivery by the courier service.
How is a Label Created and What is its Use?
Labels are created using shipping management systems and are essential for ensuring the correct and timely delivery of orders. They serve as a communication tool between the sender, courier, and recipient, containing tracking information and shipment details. This label will also be used by the warehouse team to create tracking information and facilitate further shipment processes.
Steps to Create a Label for an Order
Step 1: Login and Navigate to the Dashboard
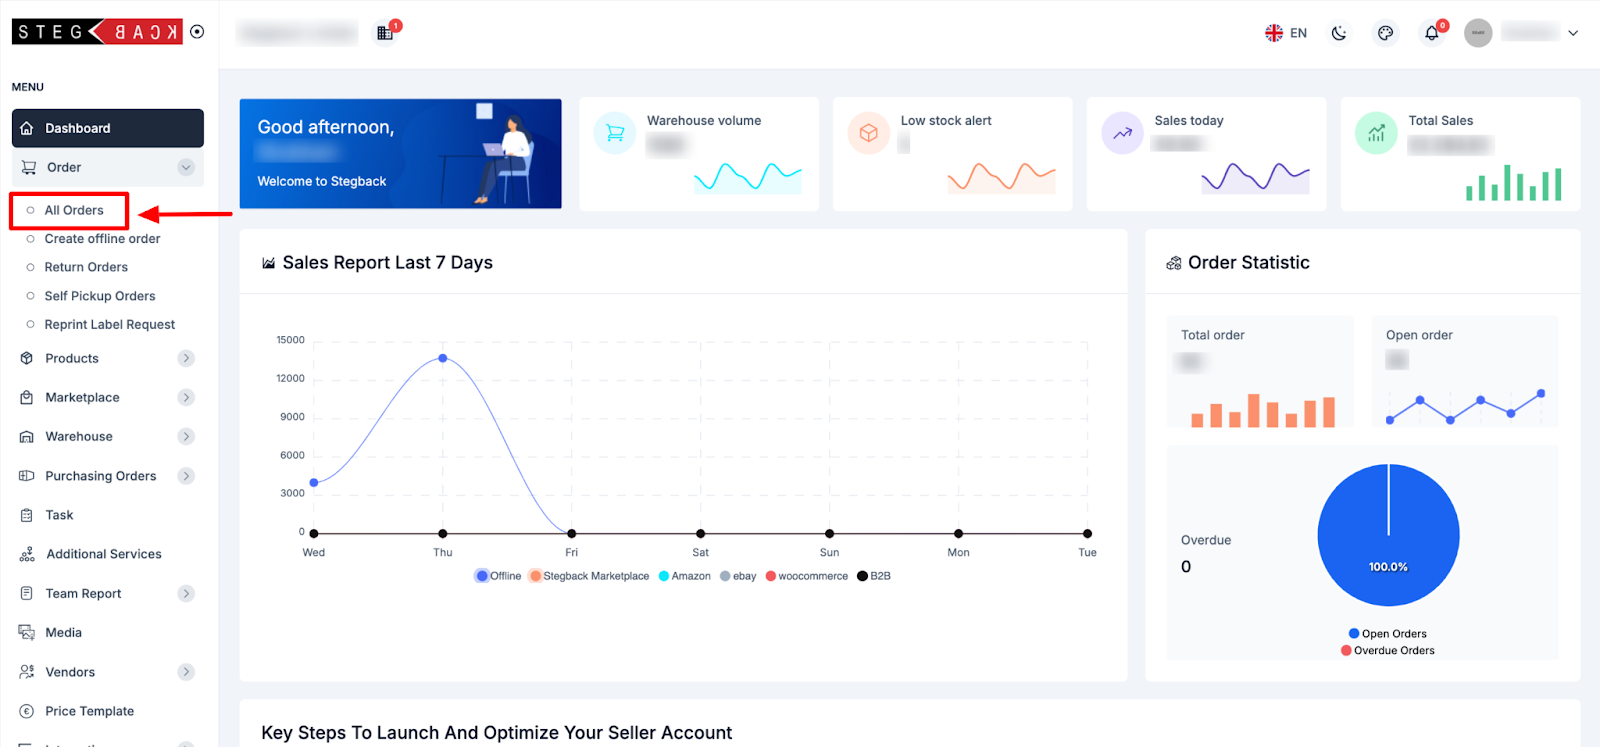
After logging in to your account, navigate to the dashboard and locate the "Orders" section. Here, you will find the "All Orders" option.

Step 2: Select the Order
From the list of orders, identify the product for which you want to create a label. Click on the "View" button associated with the selected order.

Step 3: Create Label
Click on the "Create Label" button. A dropdown menu will appear, allowing you to select the shipping provider. The system will only display shipping providers connected through valid credentials.

Step 4: Fill in the Label Form
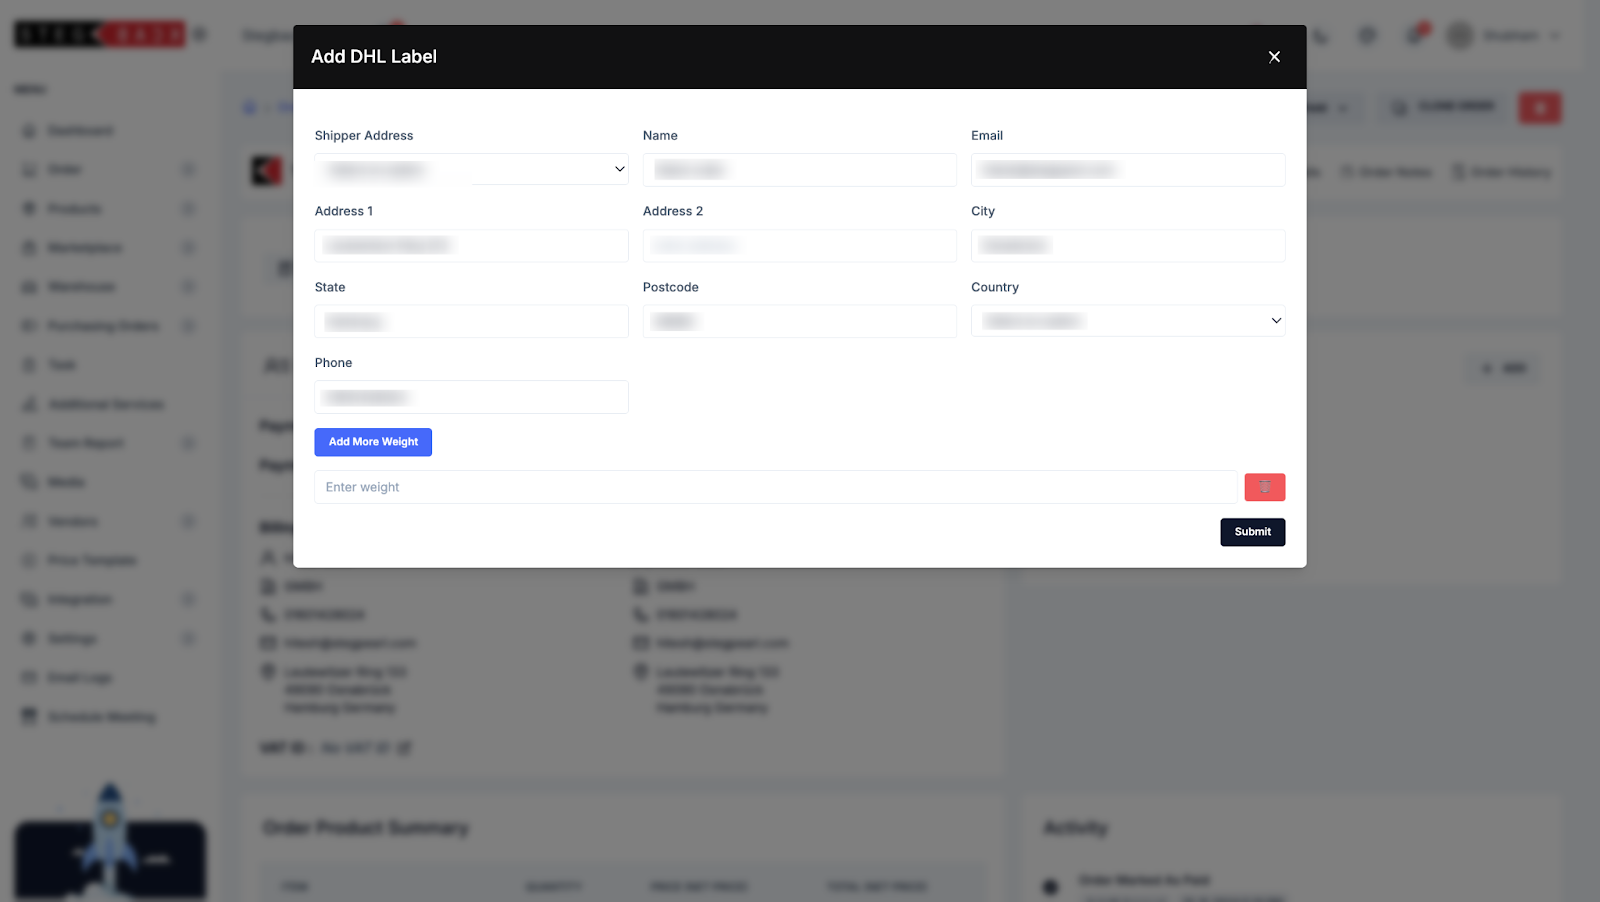
Once the shipping provider is selected, a label form specific to that provider will open. Fill in the required fields, which may vary depending on the provider. Below is an example of the DHL shipping provider’s label form fields:

- Shipper Address: Select an address from the dropdown.
- Name: Enter the recipient’s name.
- Email: Provide the recipient’s email address.
- Address 1: Enter the primary address.
- Address 2: Add additional address details (optional).
- City: Specify the city.
- State: Provide the state.
- Postcode: Enter the postal code.
- Country: Select the country from the dropdown.
- Phone: Provide the recipient’s phone number.
- Weight: Add the weight of the package by clicking on the "Add More Weight" button.
Step 5: Submit
After filling in all the required fields, click the "Submit" button. The label will be generated and can be downloaded or printed for attaching to the package.
Recent Articles
-
3 months ago
-
3 months ago
-
3 months ago
-
3 months ago
-
3 months ago


