Publish by : admin user
03 February 2025 • 6 months ago
Comprehensive Guide to Company Settings & Configuration
Category : General Configurations
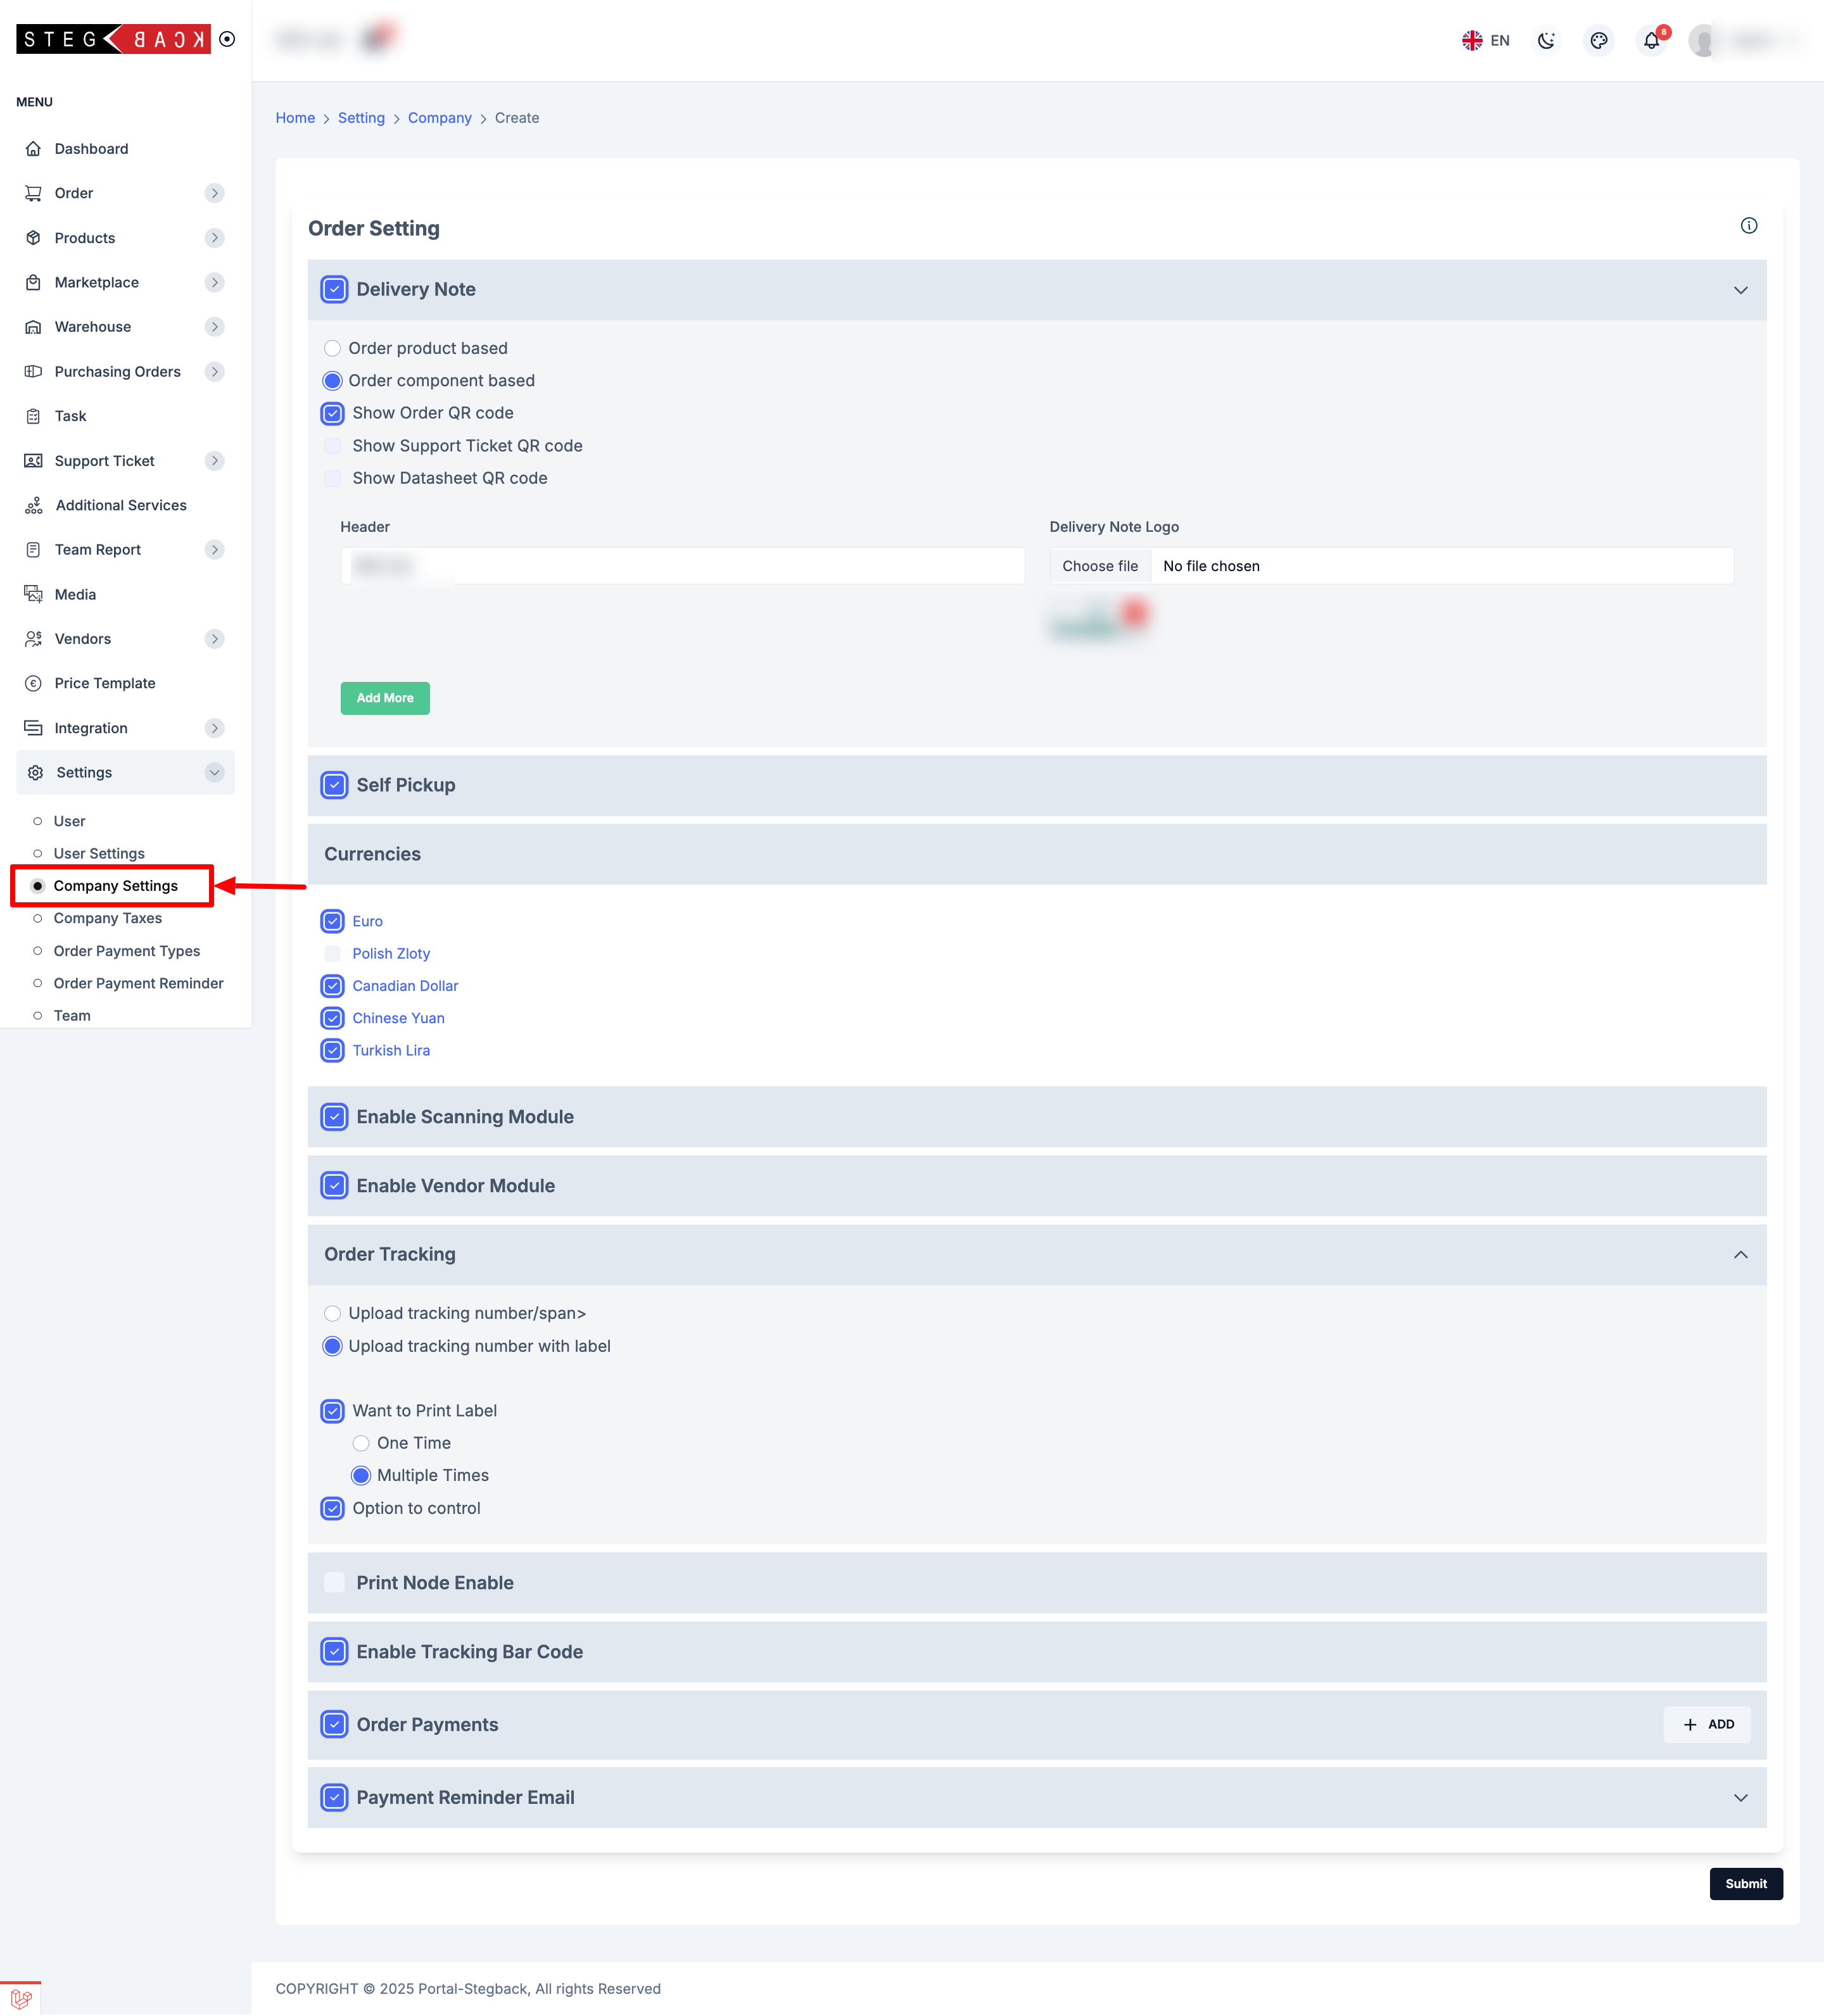
1. Delivery Note
1.1 Delivery Note Configuration
- Order product based
Checkbox/Option to specify if the delivery note should list products. - Order component based
Checkbox/Option to specify if the delivery note should list components. - Show Order QR code
Checkbox/Option to include a QR code for the order on the delivery note. - Show Support Ticket QR code
Checkbox/Option to include a QR code linking to a support ticket URL.- Support Ticket: URL field (e.g., example.com).
1.2 Delivery Note Content
- Header
Text field for adding a custom header or message at the top of the delivery note.
Example: Example.com - Delivery Note Logo
File upload field. Allows you to upload a logo that appears on the delivery note.
1.3 Key-Value Pairs
Use these fields to display additional information on the delivery note (e.g., bank details, contact info).
- Bank
- Value: XYZ
- IBAN
- Value: DE1234567890
- Telefon
- Value: +49 1234567890
- Website
- Value: example.com
- BIC
- Value: HASPDEHHXXX
Example Key
- Tax ID: DE123456789
Click Add More to create additional key-value pairs as needed.
2. Self Pickup
- Checkbox/Option to enable a “Self Pickup” feature for orders.
- When you enable Self Pickup, the self pickup option will appear in your portal inside the Order Module.
3. Currencies
A list of selectable currencies:
- Euro
- Polish Zloty
- Canadian Dollar
- Chinese Yuan
- Turkish Lira
- United States Dollar
Check all the currencies you wish to support. This typically affects pricing display and payment options in the application.
4. Enable Scanning Module
- Checkbox to activate a scanning module.
- When enabled, it may allow barcode or QR code scanning within your order management process.
5. Enable Vendor Module
- Checkbox to enable or disable a vendor module.
- When you enable the Vendor Module, a Vendor option shows up in the portal. You can then add a new vendor or assign an existing vendor to a product.
6. Order Tracking
6.1 Tracking Number Configuration
- Upload tracking number/span>
Allows you to store only a tracking number for the shipment. - Upload tracking number with label
Allows you to store a tracking number alongside a label (e.g., carrier name, shipping method). This also includes Print Label Configuration options such as:- Want to Print Label
- One Time: Print the shipping label only once.
- Multiple Times: Allows printing the shipping label repeatedly.
- Option to Control
- An additional setting to manage how labels or tracking details are handled (depends on your system’s implementation).
- Want to Print Label
7. Print Node Enable
- Checkbox to turn on or off “Print Node.”
- If enabled, this may integrate with a cloud printing service or direct printing functionality for order documents (labels, invoices, etc.).
- After selecting the Print Node option, you have an additional setting to add a printer using valid keys. This option is also shown inside the Settings menu.
8. Additional Settings & Options
- Enable Tracking Bar Code
- When checked, the system generates and displays a barcode for each order’s tracking number.
- Important: This barcode also appears on the delivery note, making it easy for staff or customers to scan and quickly look up orders.
- Order Payments
- Toggling this on activates advanced payment features. Once enabled, a new “Order Payment Type” option appears in Settings, where you can add various payment methods (e.g., PayPal, credit card processors, etc.).
- This allows you to manage and customize how customers pay for their orders, configure multiple payment providers, and set up specialized payment rules if required.
- Payment Reminder Email
- When enabled, the system sends automated reminder emails to customers with pending or overdue payments.
- You can set when these reminders go out—for example, one day after the product is delivered, or a week later, or any other timeline your business requires.
- Configure this scheduling within the Settings, so you have full control over the timing and frequency of reminder emails.
9. Submit
- Submit button is located at the bottom of the page.
- Clicking Submit saves all the changes and updates your order settings accordingly.
- After every change, You must press the Submit button.
Recent Articles
-
5 months ago
-
5 months ago
-
5 months ago
-
5 months ago
-
5 months ago