
Publish by : admin user
20 December 2024 • 8 months ago
How to create Variable Product
Category : Products
Create a Variable Product on the seller portal
Variable Product: A variable product is a type of product in e-commerce or retail systems that comes in multiple variations or options, such as different sizes, colors, styles, or materials. These variations typically affect the price, inventory, and attributes of the product, but they are all linked to a single product listing. This is in contrast to a simple product, which typically has only one variant (e.g., one color and one size).
Examples of Variable Products:
1. Clothing
- Product: T-shirt
- Variations:
- Size: S, M, L, XL
- Color: Red, Blue, Green
- Price: May vary slightly depending on size or color
- Inventory: Each size and color combination will have its own inventory.
- Variations:
2. Shoes
- Product: Running Shoes
- Variations:
- Size: 7, 8, 9, 10, 11
- Color: Black, White, Red
- Material: Leather, Mesh
- Price: Some sizes or colors may be more expensive.
- Inventory: Stock varies by size or color.
- Variations:
Steps for the create Variable Product:
Attribute and Attribute term
Step 1: Login to the Seller Portal
- Access the Seller Portal:
- Go to the seller portal login page (Stegback.com).
- Enter your credentials (Username and Password) to log in.
- Click on "Login" to access the portal.
- Dashboard Access:
- After logging in, you will be automatically redirected to the Seller Dashboard.
- The dashboard is where you can manage all your products, orders, and other important settings.
Step 2: Navigate to the 'Add Attributes' Section
- Find the Attributes Section:
- Click on the "Add Attributes" option to begin the process of creating a new product attribute.
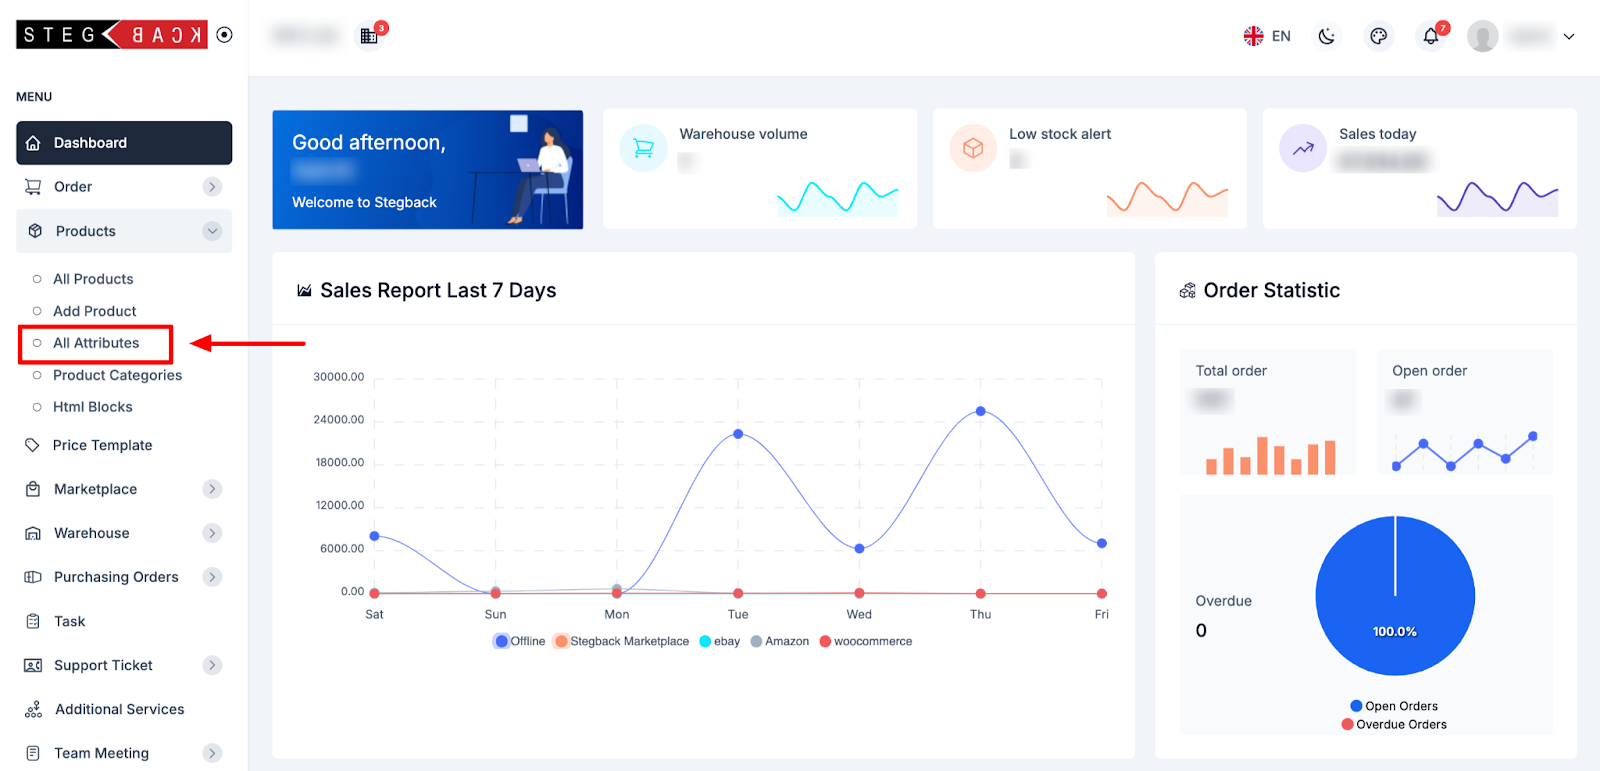
- Open the Add Attributes Form:
- This will open the Add Attributes form, where you can define new attributes like size, color, material, etc.
Step 3: Fill in the Required Details
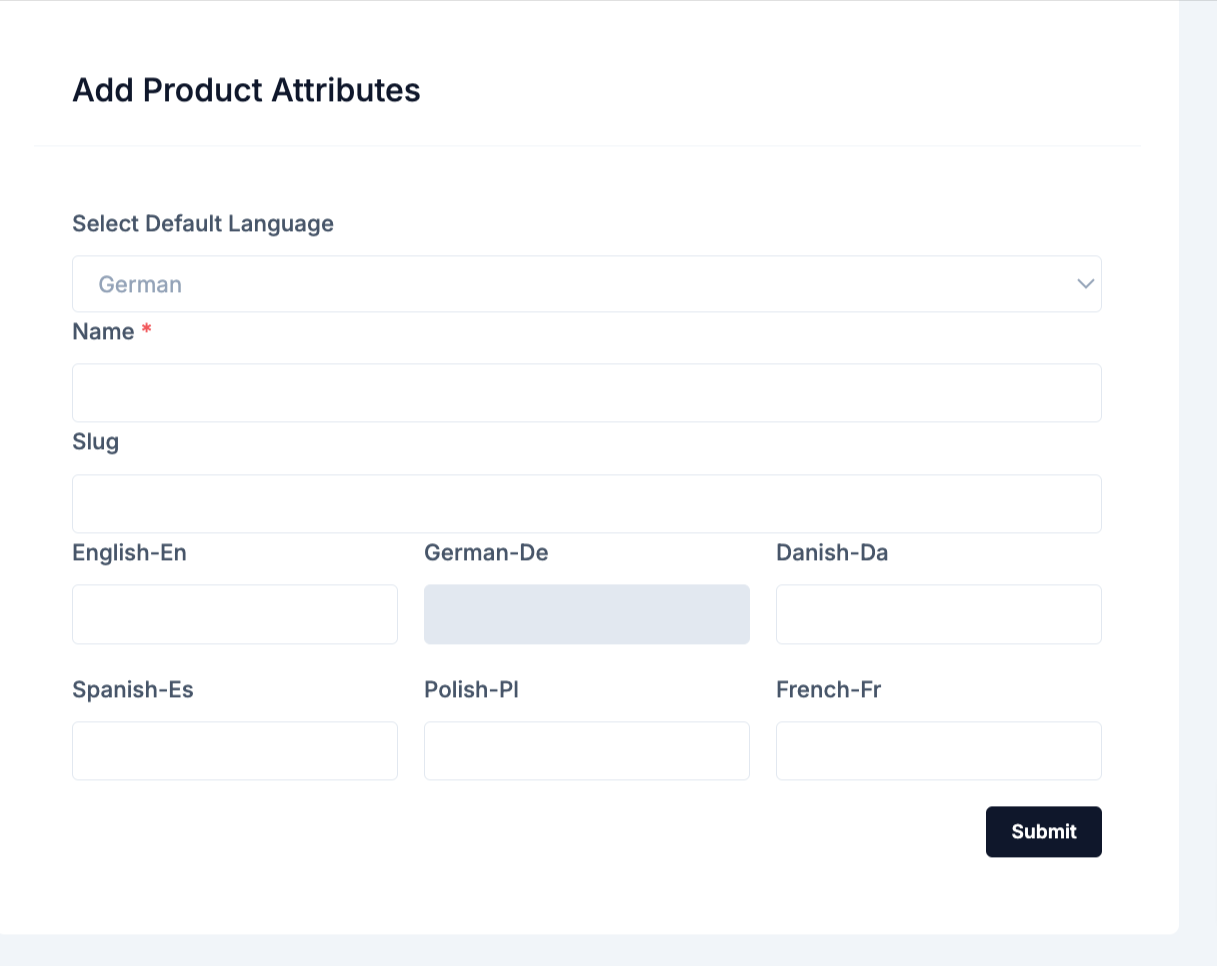
Step 4: Submit the Form to Create the Attribute
- Review the Attribute Details:
- Double-check the details you entered to ensure accuracy.
- Submit the Form:
- Click on the "Submit" button to save the new attribute.
- Once submitted, you will receive a confirmation message, and the newly created attribute will be added to your Attributes List.
- View the New Attribute:
- After submission, navigate to the Attributes List, where you should see the newly created attribute displayed.
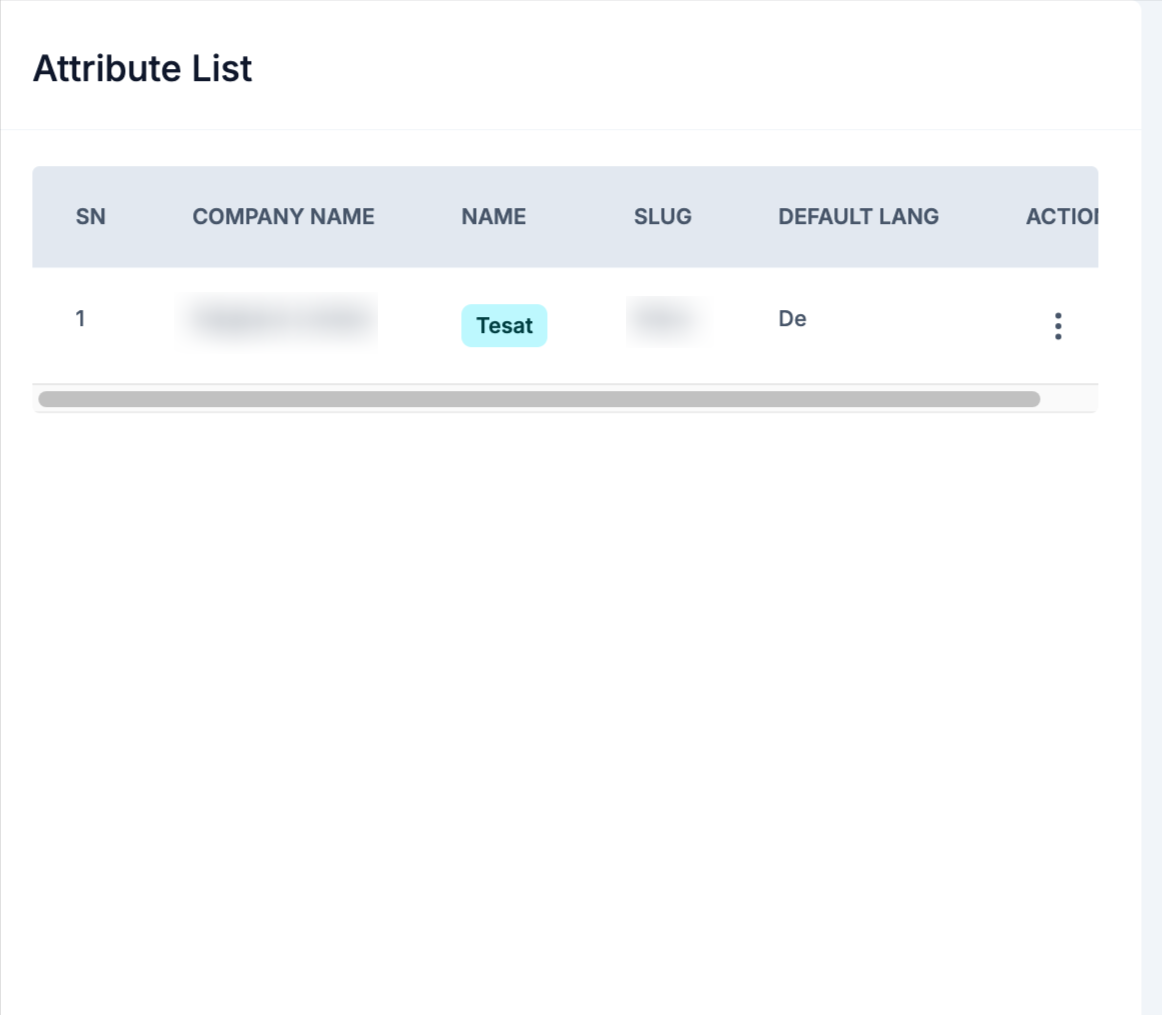
Step 5: Create Terms for the Attribute
1. Navigate to the Listed Attribute:
- Go to the Attributes List section, where the attributes you’ve created are displayed.
- Find the attribute you want to create terms for (e.g., Size, Color).
2. Click on the Attribute Name:
- Click on the attribute name to open the attribute details page for that specific attribute (e.g., Size).
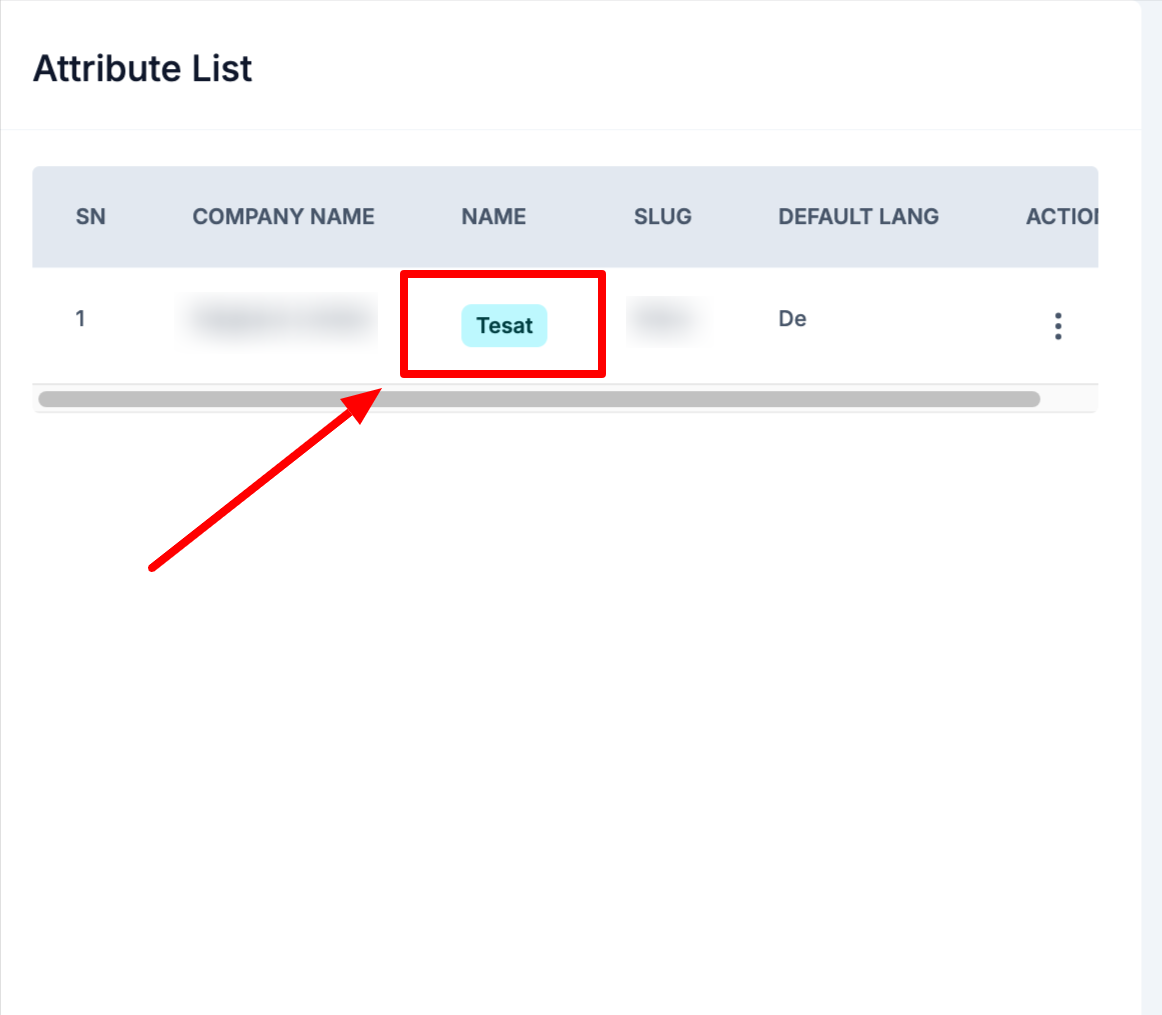
Step 6: Fill in the Term Details
- Enter the Term Name:
- Fill in the "Name" field with the term (e.g., Small, Medium, Large for Size or Red, Blue, Green for Color).
- Set the Slug (Optional):
- Optionally, provide a slug for the term (a URL-friendly version of the term name).
- Language (Optional):
- If applicable, provide Language for the term in the available language fields (e.g., English, German, Spanish, etc.).
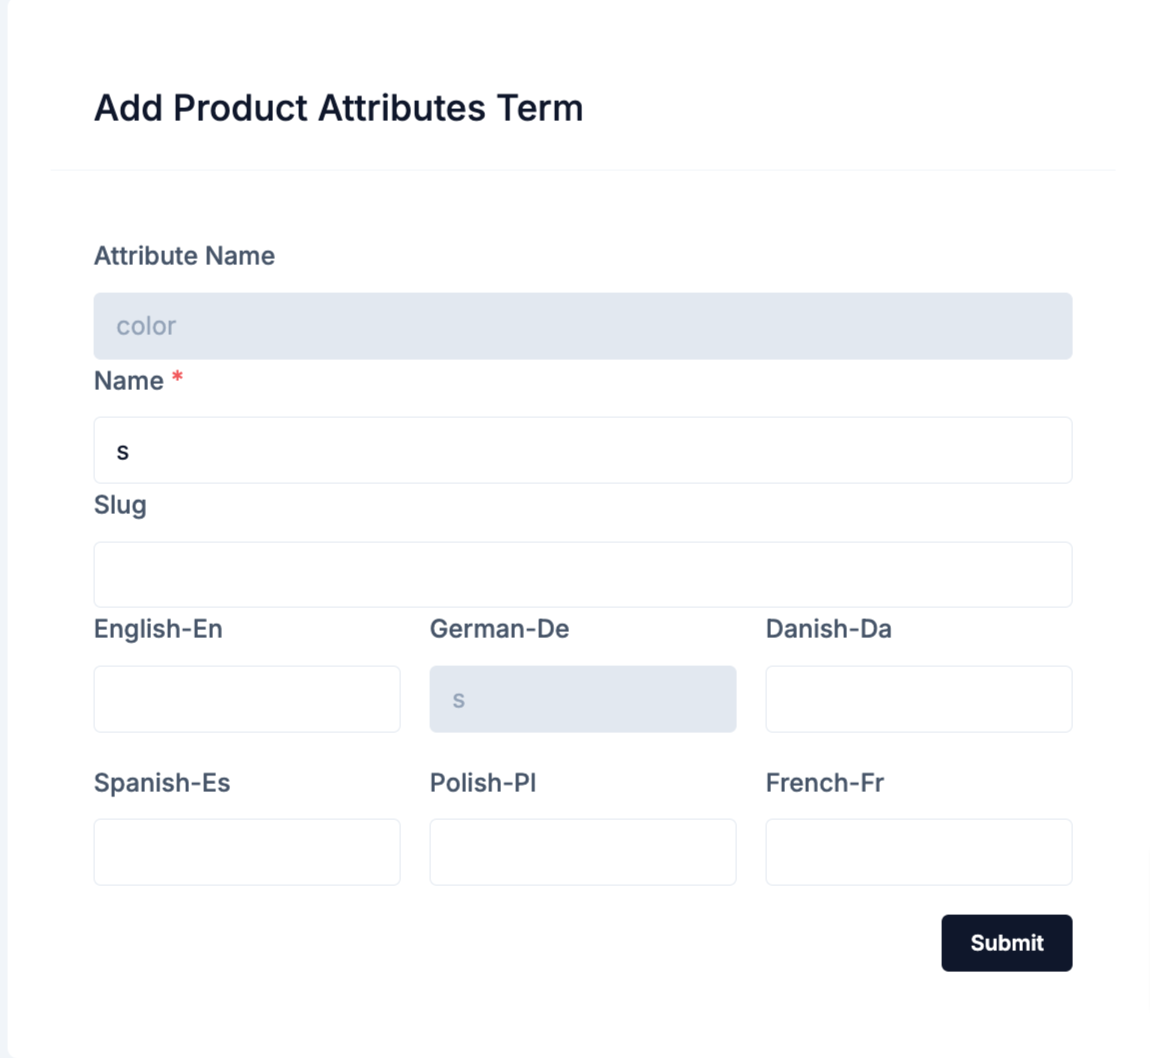
Step 7: Review and Submit the Term Form
- Review the Term Details:
- Ensure all fields are correctly filled.
- Submit the Form:
- Click on the "Submit" button to save the term.
- View the New Term:
- After submission, the new term will be listed under the respective attribute on the Attributes List page.
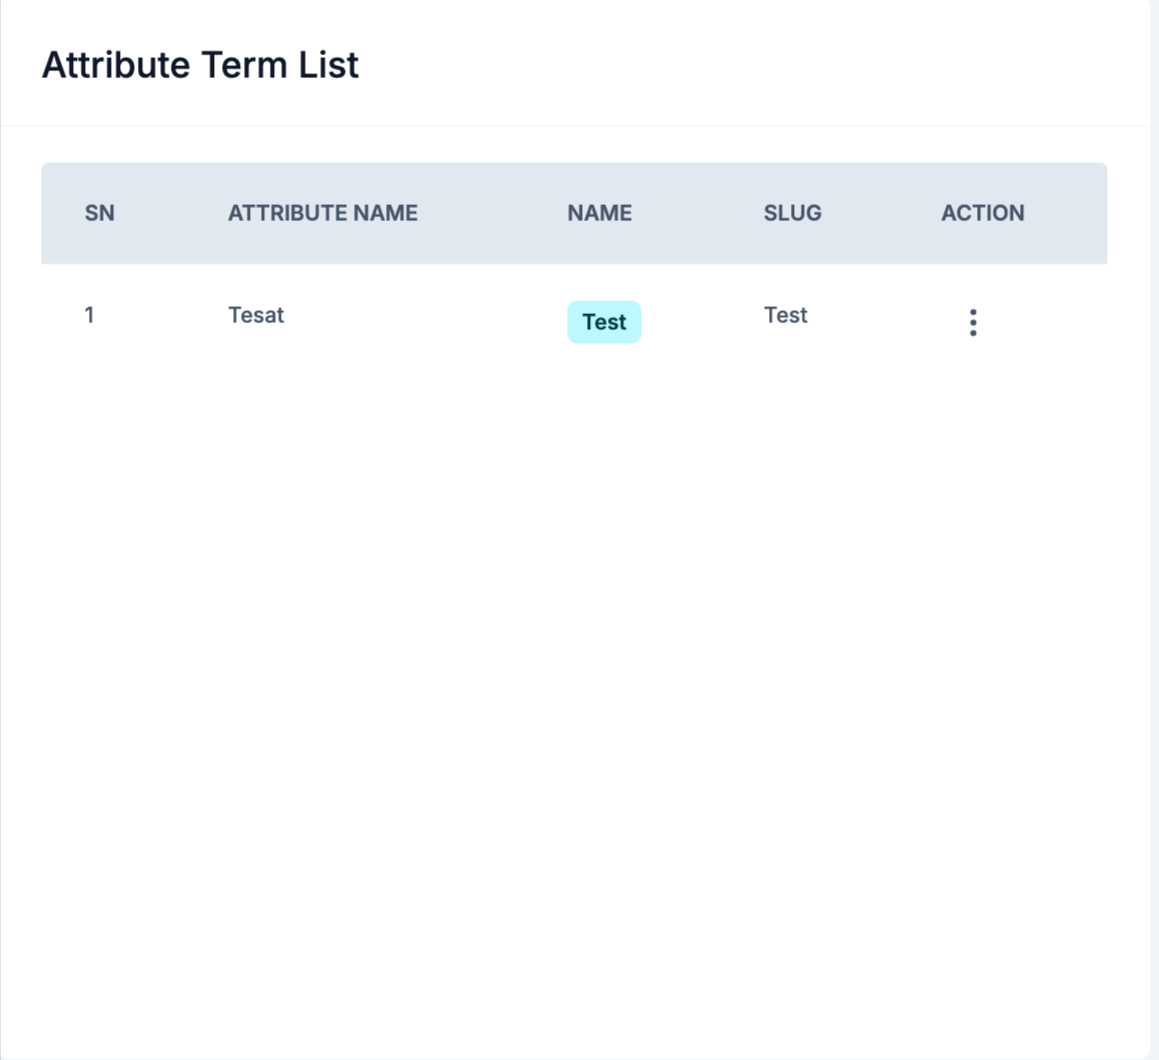
Step 8: Create the Variable Product
- Go to the Add Product Section:
- Navigate to the "Add Product" section from the dashboard.
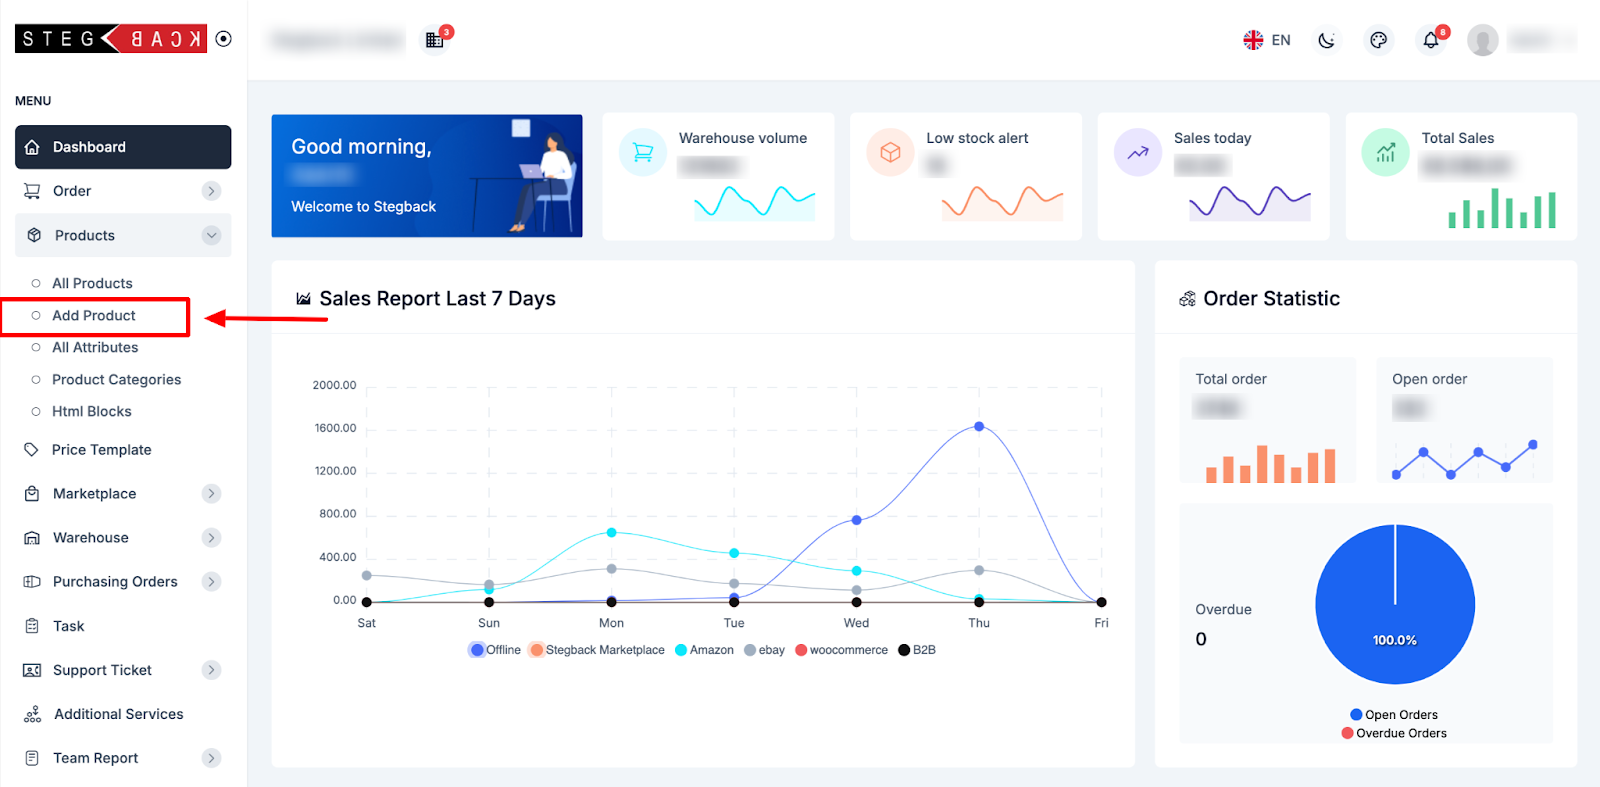
- Select Variable Product:
- In the product type select "Variable Product."

- Handle Attributes and Terms:
- If attributes and terms have been created beforehand, proceed to the next step.
- If not, a popup will appear prompting you to create attributes and terms. Follow the steps above to create them before proceeding.
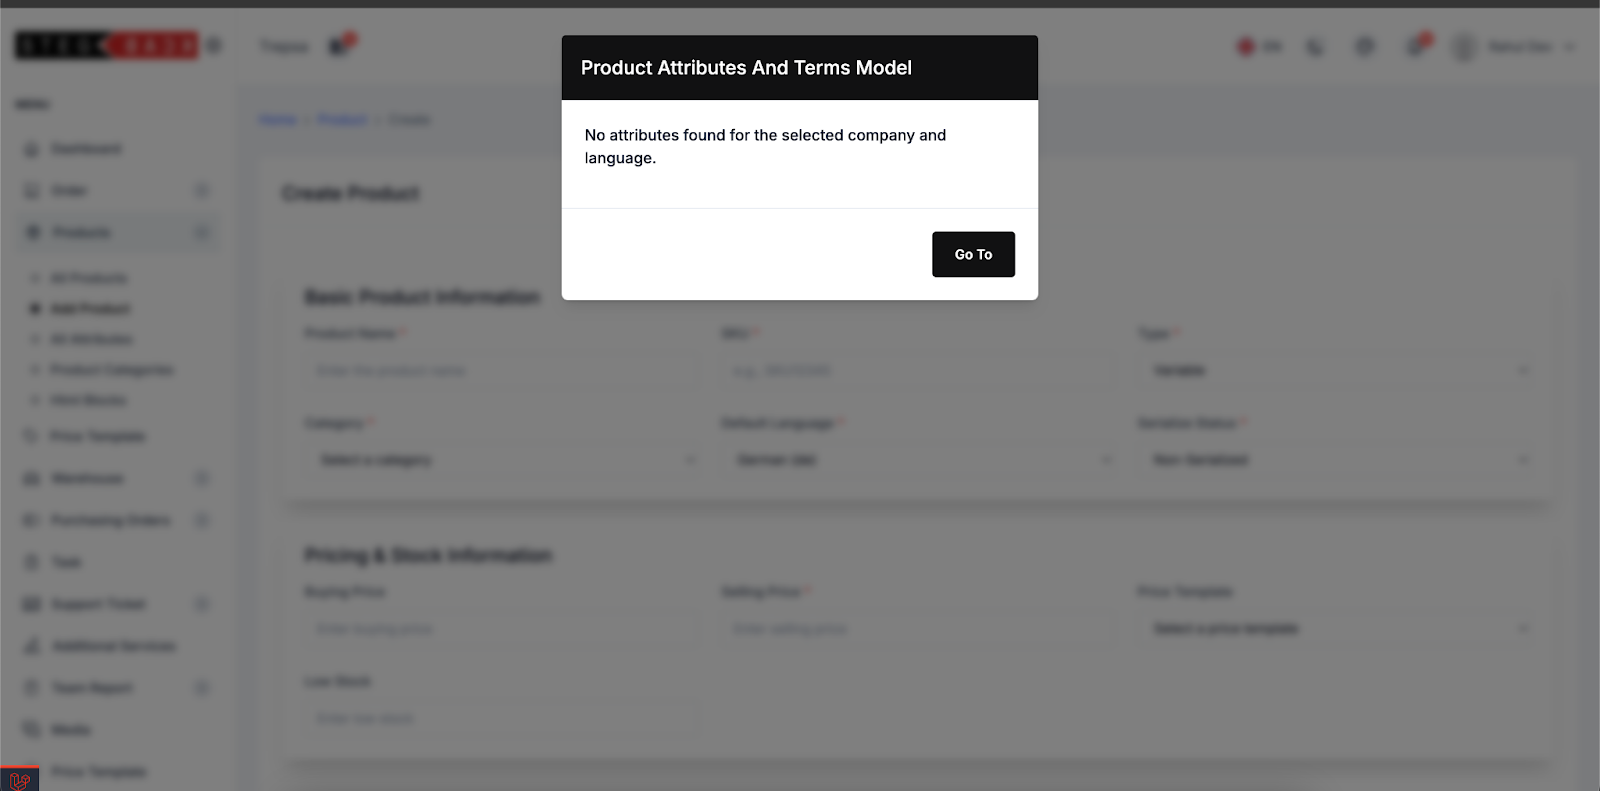
- Fill in Required Fields:
- Basic Product Information:
- Product Name: Enter the name of the product (required).
- SKU: Provide a unique identifier for the product (required).
- Type: Select "Variable" from the dropdown.
- Category: Assign the product to the relevant category (required).
- Default Language: Choose the default language for the product.
- Serialize Status: Select "Serialized" or "Non-Serialized" as appropriate.
- Basic Product Information:

- Pricing & Stock Information:
- Buying Price: Enter the cost price of the product.
- Selling Price: Provide the selling price (required).
- Price Template: Select a predefined price template if available.
- Low Stock: Set the threshold for low stock alerts.

- Shipping Information:
- Estimated Delivery Days: Enter the estimated number of days for delivery.
- Weight: Specify the product weight.
- Dimensions (L x B x H): Enter the product dimensions.
- Unit: Select the unit of measurement.

- Media & Descriptions:
- Product Featured Image: Upload a main image for the product.
- Product Gallery Image: Upload additional images for the product gallery.
- Short Description: Provide a brief description of the product (required).
- HTML Description: Add detailed product information in HTML format if needed.

- Identifier:
- EAN, UPC, GTIN, MPN, ISBP: Enter any applicable identifier values for the product.

- Taxable:
- Taxable or Non-Taxable: Select whether the product is taxable or non-taxable.

Submit the Form:
- Click on the "Submit" button to save the product.
- View Product Status:
- After submission, the product will be listed on the "All Products" page with a status of "Pending."
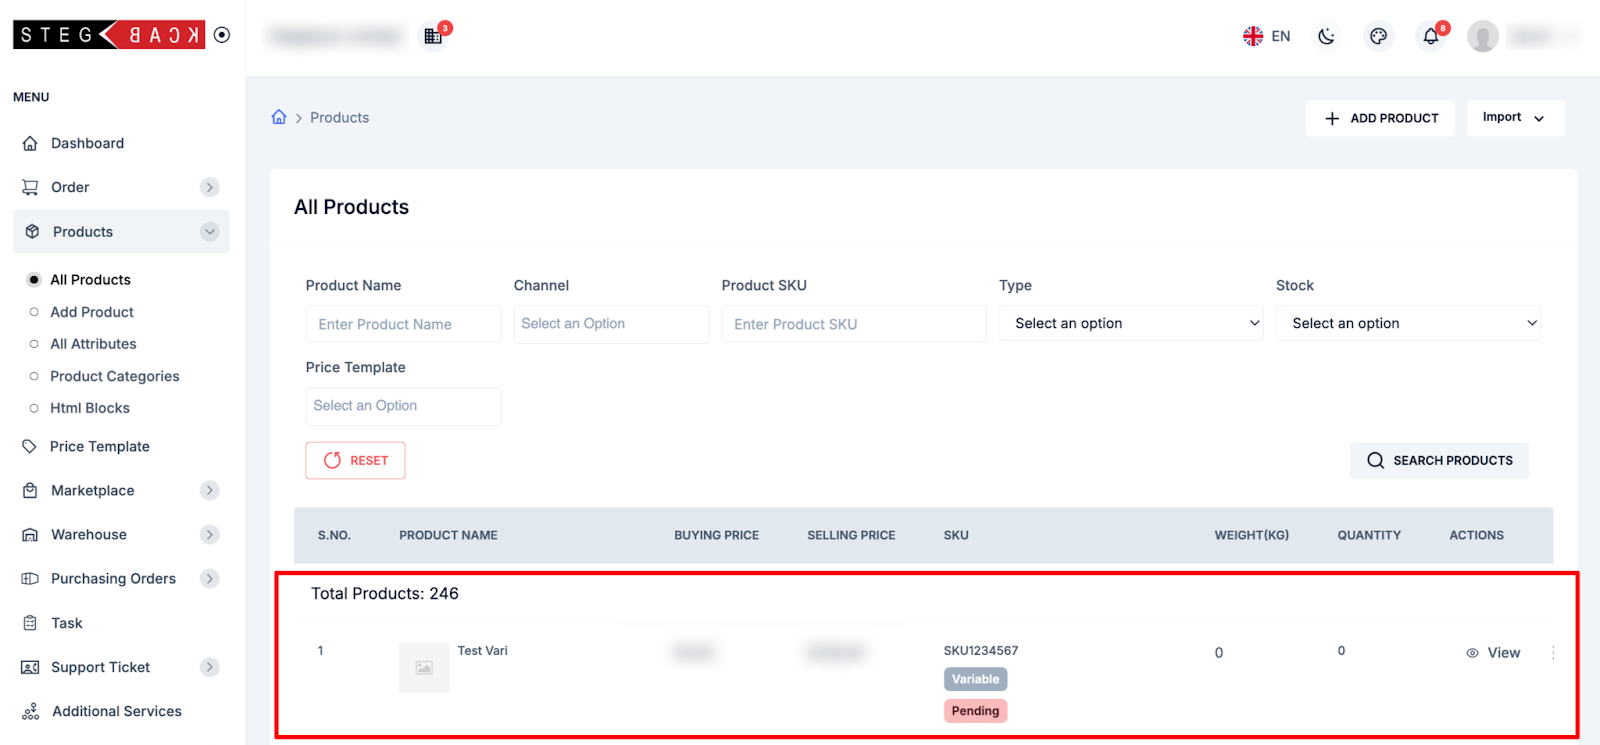
Step 9: Create Variations for the Variable Product
- Go to the Listed Variable Product:
- Navigate to the "All Products" section and locate the listed variable product.
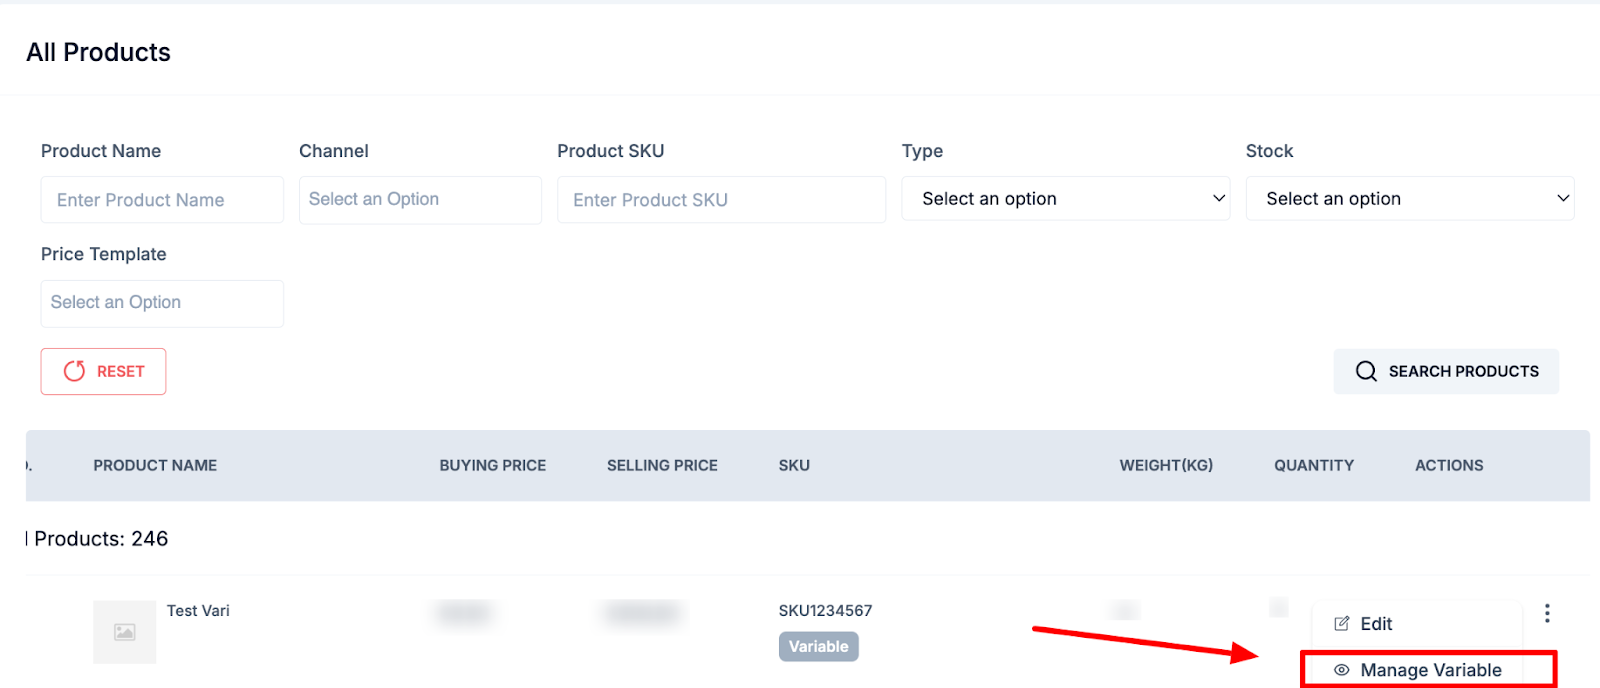
- Manage Variables:
- Click on the three dots next to the product and select "Manage Variable."
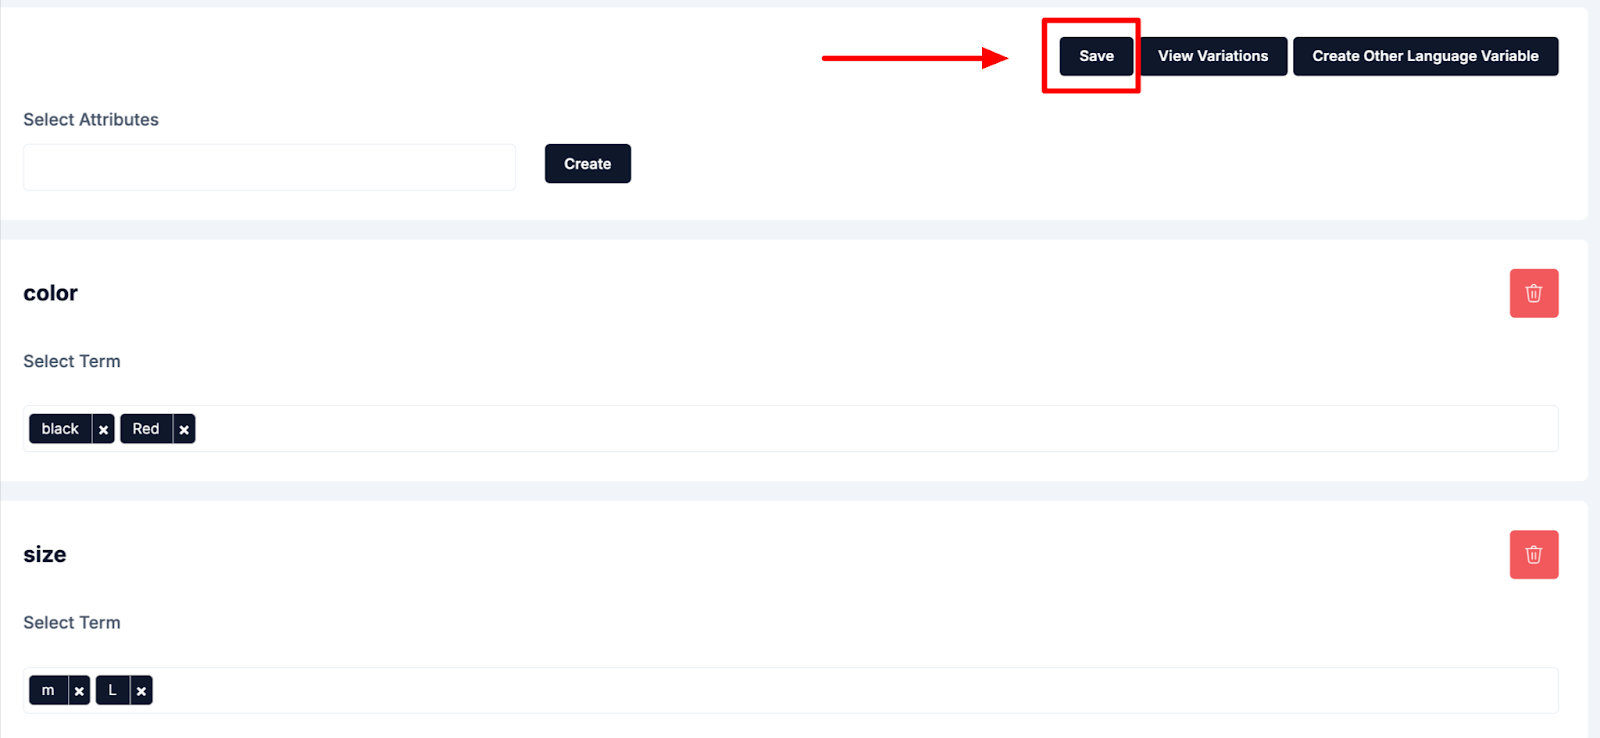
- Create Variables:
- Select the desired Attributes and click on "Create."

- Select Attribute Terms:
- Choose the attribute terms (e.g., Size: Small, Medium, Large; Color: Red, Blue, Green) for the selected attributes.
- Save the changes.
- Update Product Status:
- After saving, the "Pending" status of the variable product will be removed on the listed page.

Step 10: Add Details to Variations
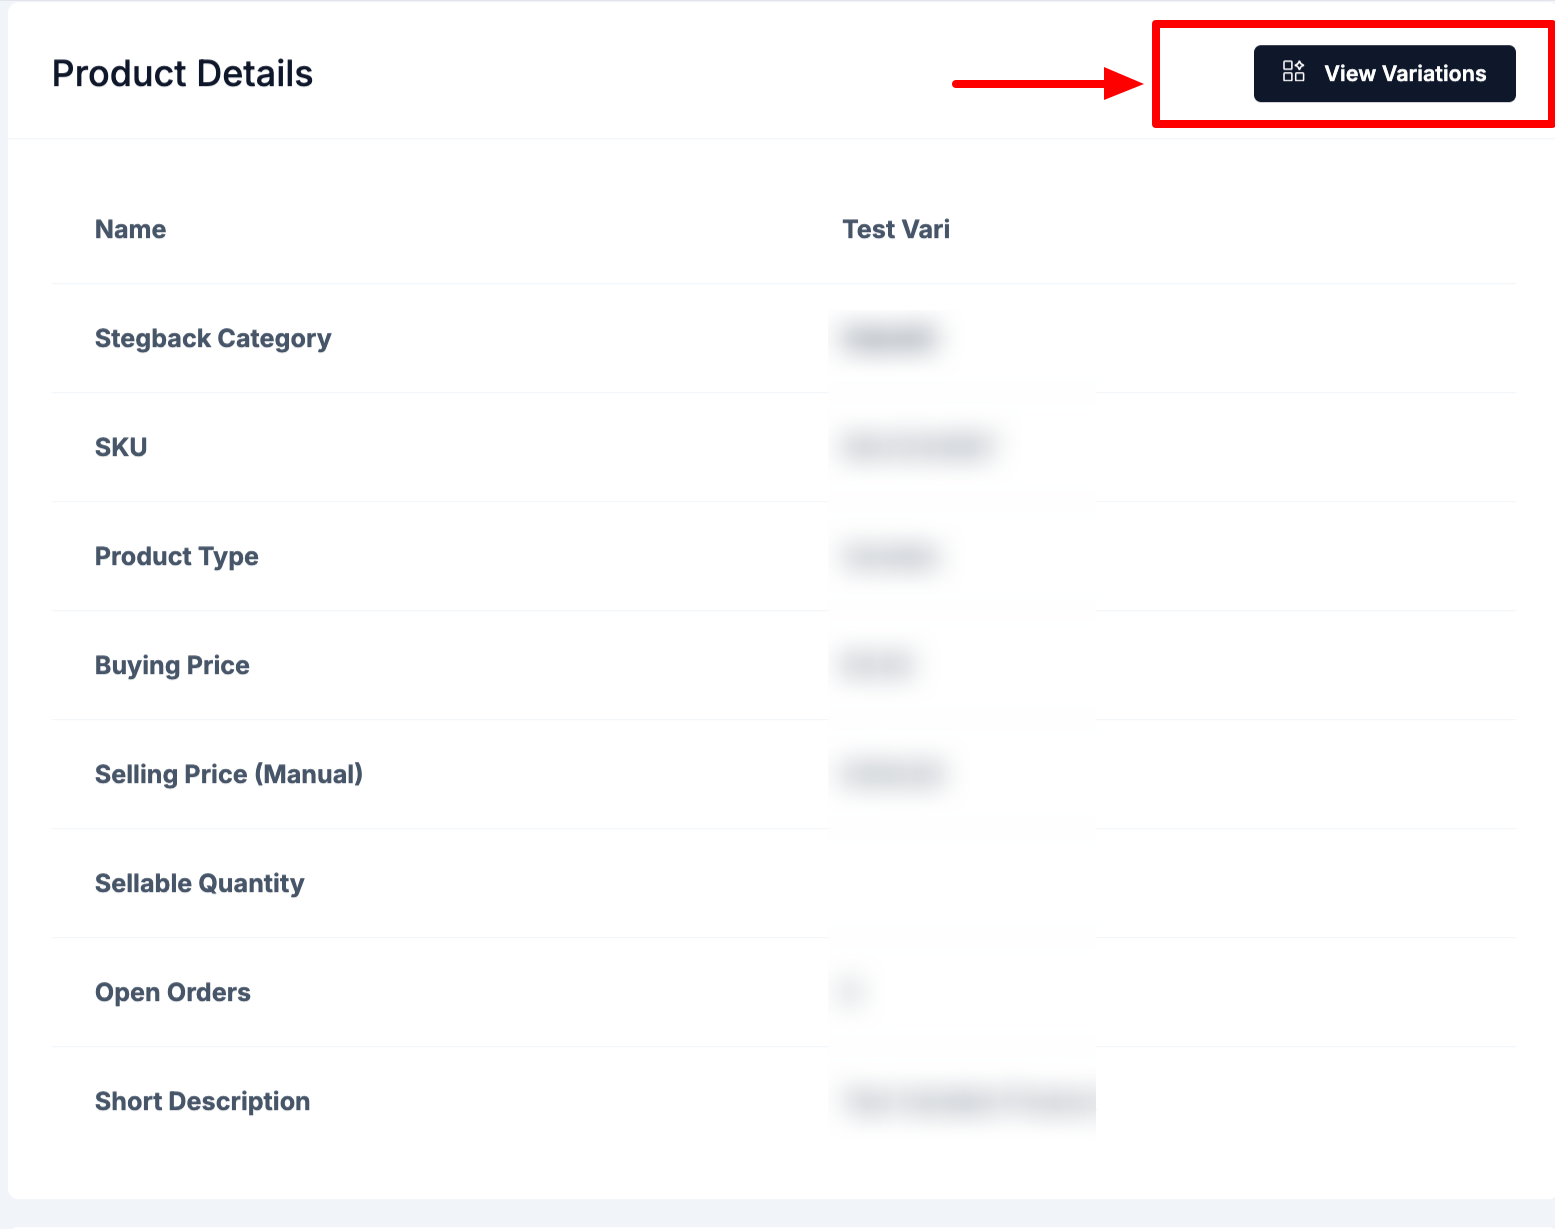
1. View Variations:
- Click on the product "View" button and go to "View Variation."
2. Add Specific Details:
- You can update the variation details using two methods:
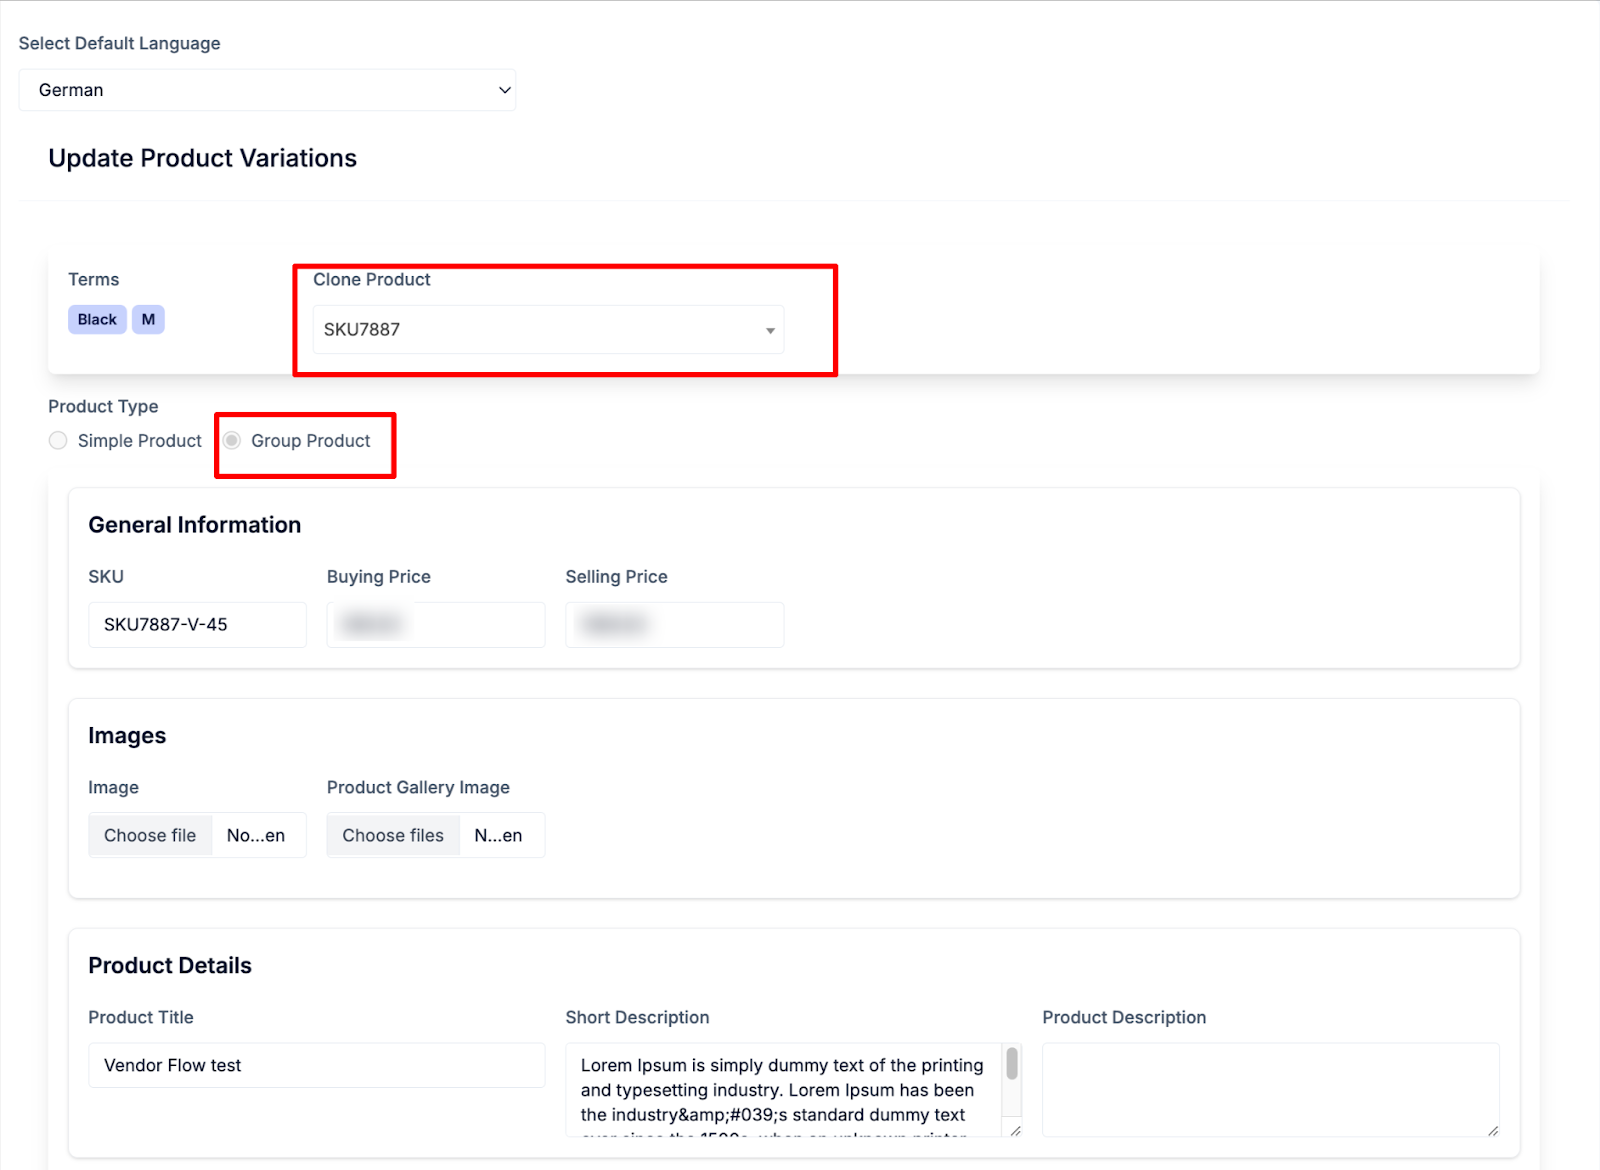
A. Clone Product:
- Search for an existing product by SKU.
- Add the product to a group or as a simple product.
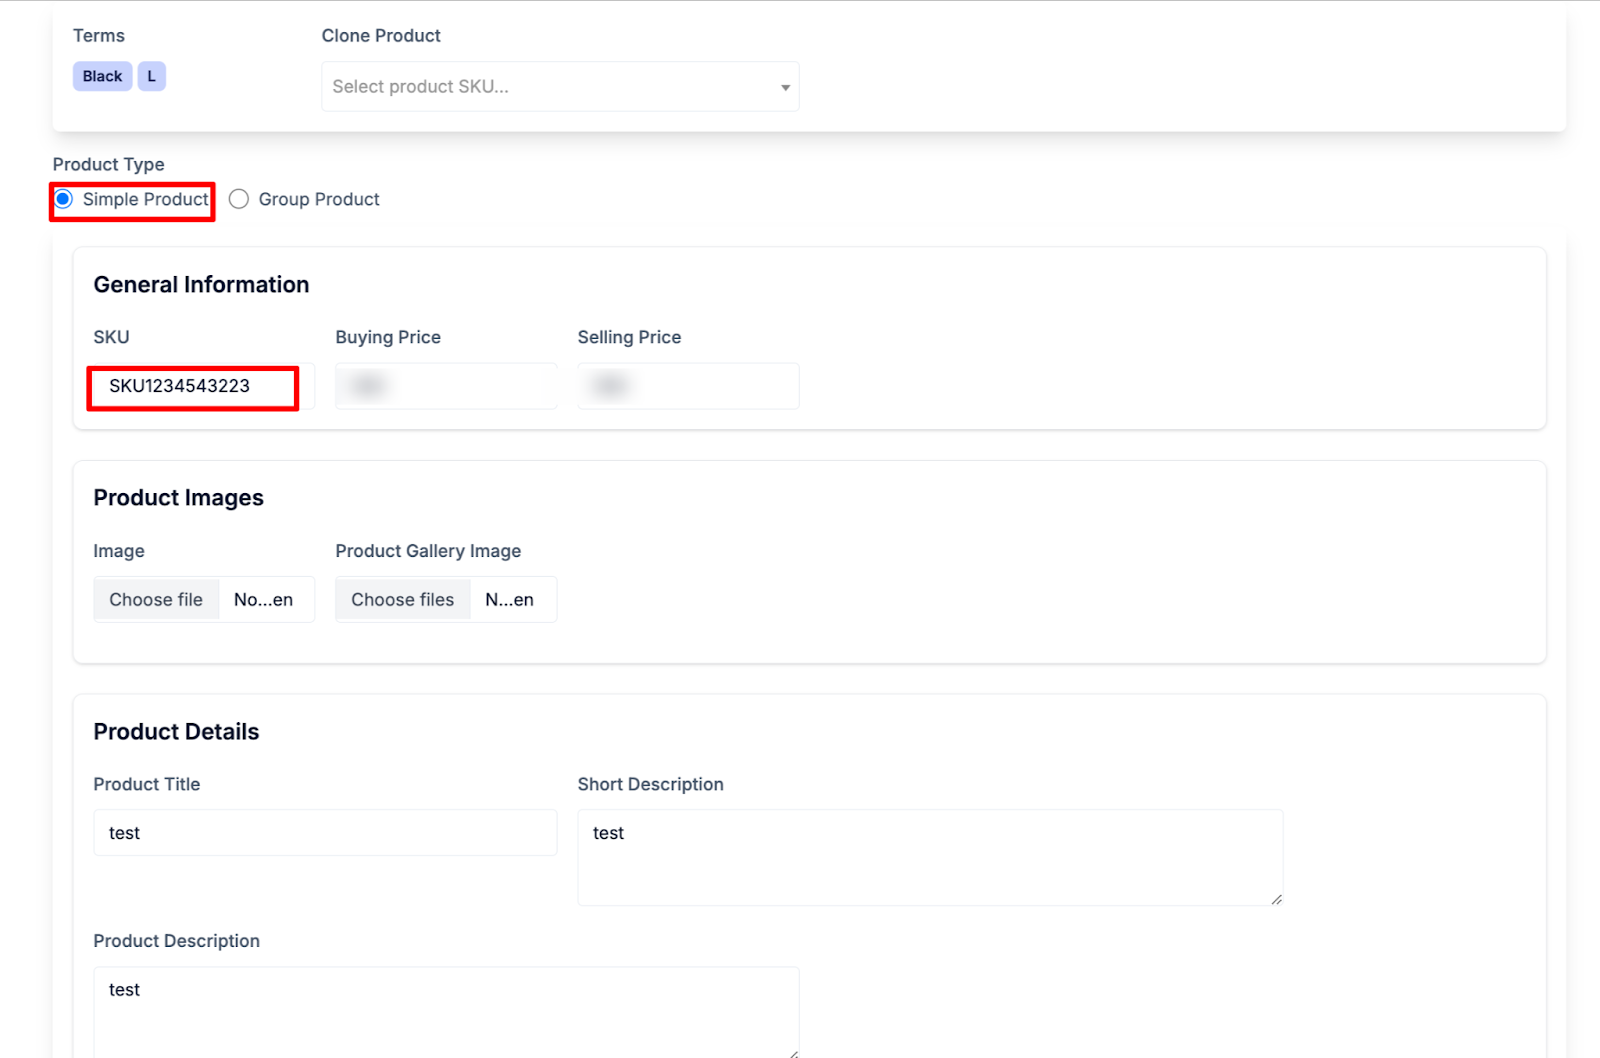
B. Add Details Manually:
- Select single or grouped variations and manually input the required details, such as price, stock, and other attributes.
3. Add Component:
I can add a component to a single product in the term, In this case the product type will change to "Group Product" after the submit changes. And this is same for the clone product.
I can add simple product as the component and that simple product is already created.
By searching SKU add simple product as component

4. Submit the Variations Page:
- After adding components and configuring variations, click Submit to save the changes.
- This updates the variable product with the new components.
5. Product Save Behavior
- If the product type is updated to a Grouped Product:
- The grouped product will not appear in the Product List because it is treated as a container for components.
- Instead, its components (the linked simple products) are individually saved and listed as simple product.
Recent Articles
-
6 months ago
-
6 months ago
-
6 months ago
-
6 months ago
-
6 months ago


