Publish by : admin user
19 December 2024 • 6 months ago
Vendor module Guide
Category : Inventory Management
1. What is the Vendor Module?
The Vendor Module serves as the centralized system to manage vendor-related information. It allows businesses to:
- Add and maintain vendor details (e.g., name, contact information, and shipping prices).
- Assign vendors to products for efficient supply chain management.
- Manage orders directly with vendors for seamless operations.
2. Key Features of the Vendor Module
Key Attributes of Vendors:
- Vendor Details: Information such as vendor name, company, email, phone number, and address.
- Default Shipping Price: Configure the base shipping cost for each vendor.
- Automatic Order API: Enable or disable API integration for automated order placement with the vendor.
- Email Settings: Specify if order or delivery notes should be sent to the vendor via email.
- Vendor Logo and Description: Add visual and descriptive details for better identification.
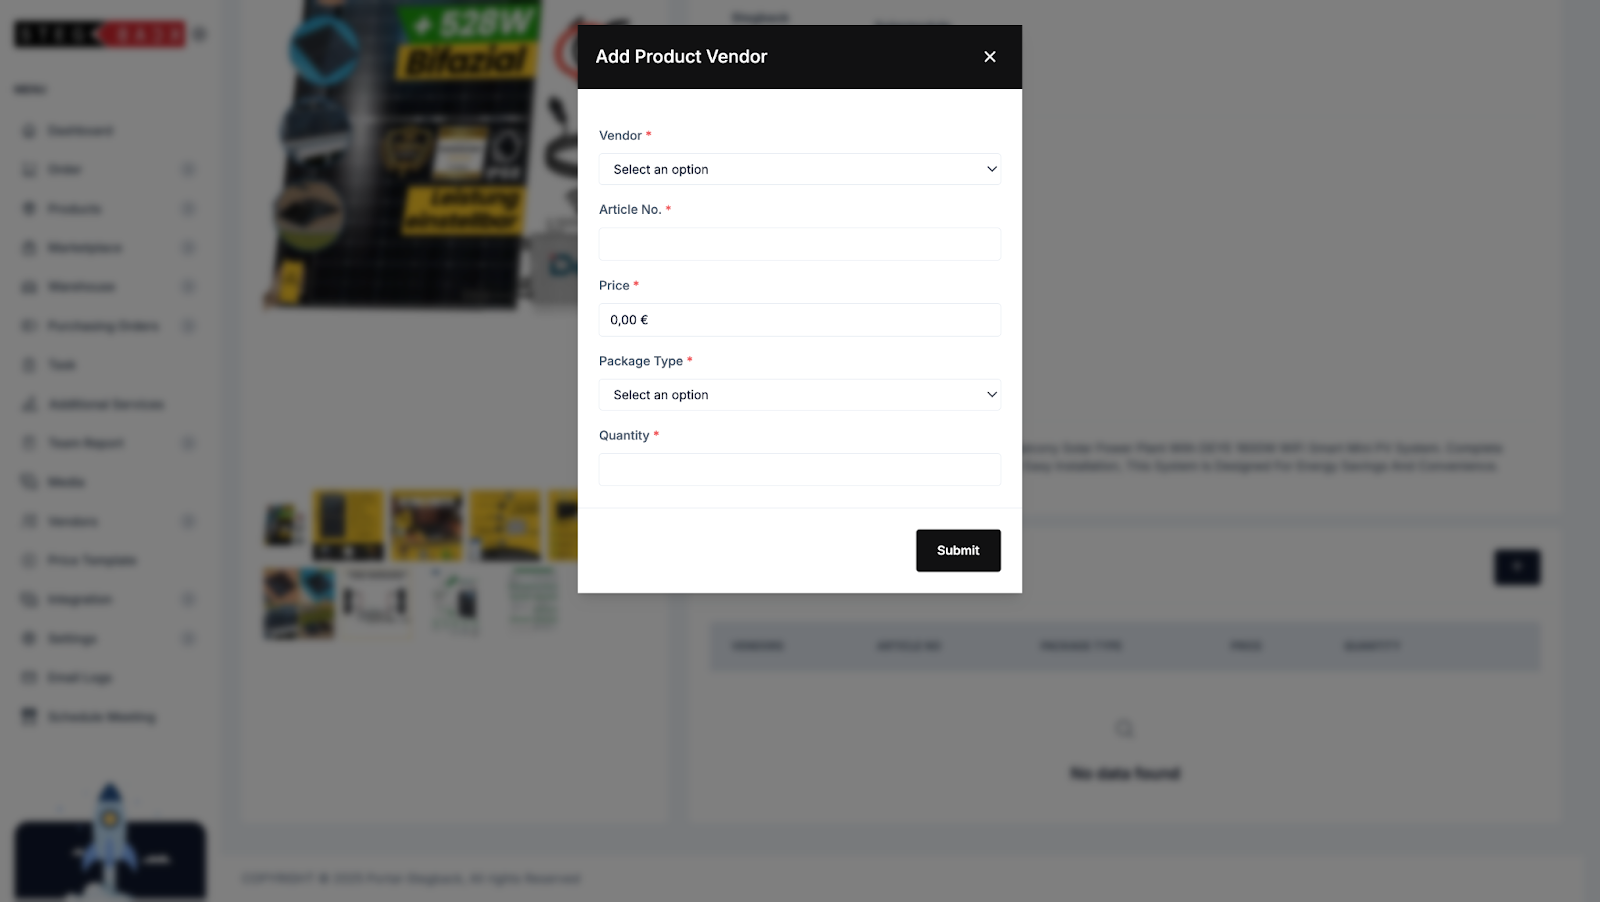
3. How to Create a Vendor?
Steps to Add a New Vendor:
- Navigate to the Vendor Module:
- On the dashboard, click on the Vendor section and select Add Vendor.

- Fill in the Vendor Details:
- Vendor Name: Enter the name of the vendor (e.g., "ABC Supplies").
- Company: Add the vendor’s company name.
- Email and Phone: Provide the vendor's email address and phone number for communication.
- Country: Select the vendor's country from the dropdown menu.
- Default Shipping Price: Set the vendor’s base shipping fee, if applicable.
- Order Emails: Add additional email addresses (if any) for receiving orders.
- Enable or Configure Options:
- Is Email Send: Check this box to enable automated emails to the vendor.
- Is Delivery Note Attachment: Enable this to send delivery notes with orders.
- Automatic Order API: Choose "Yes" if the vendor supports API-based automatic order placements; otherwise, select "No."
- Additional Information:
- Website Link: Add the vendor's website URL.
- Description: Provide any relevant details about the vendor.
- Vendor Logo: Upload a logo to visually represent the vendor.
- Submit the Vendor:
- Click the Submit button to save the vendor. A confirmation message will appear upon successful creation.

4. How to Assign a Vendor to a Product?
Once a vendor is created, it can be assigned to one or more products to streamline product sourcing.
Steps to Assign a Vendor to a Product:
- Go to the Products Section:
- Navigate to the Products module and either add a new product or edit an existing one.

- Locate the Vendor Assignment Field:
- In the product form, find the Vendor dropdown menu.
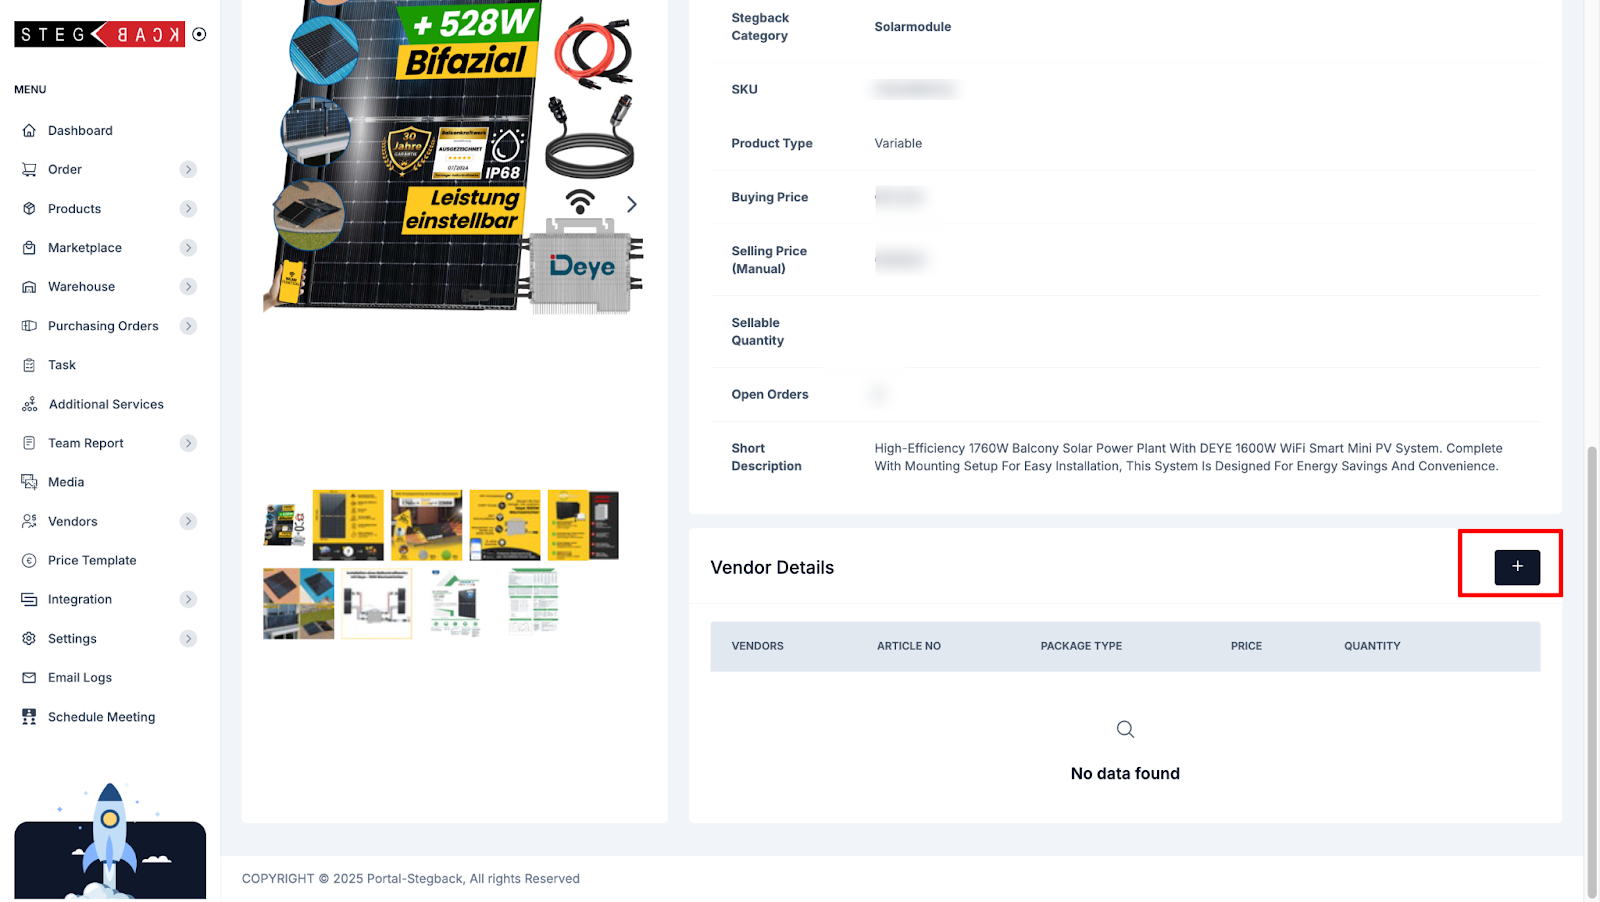
- Select the Vendor:
- Choose the desired vendor from the dropdown list. If the vendor is not visible, ensure that the vendor has been created in the Vendor Module.
- Save the Product:
- Click Submit to save the product with the assigned vendor.
5. How to Manage Orders with Vendors?
The Vendor Module integrates with the Order Management System to track and manage vendor orders effectively.
Steps to Manage Vendor Orders:
- View Assigned Orders:
- Go to the Orders section and filter orders based on the vendor. This will display all products assigned to the vendor.
- Send Orders to Vendors:
- For manual order placements:
- Select the order and click Send Order to notify the vendor via email.
- Ensure the Is Email Send option is enabled for the vendor.
- For automated orders:
- If Automatic Order API is enabled, the order is sent directly to the vendor without manual intervention.
- For manual order placements:
- Track Order Status:
- Use the Order Status tab to monitor vendor order progress (e.g., Pending, Shipped, Delivered).
- Update statuses manually or rely on API updates (if enabled).
- Delivery Note Management:
- Attach delivery notes with order confirmations by enabling Is Delivery Note Attachment for the vendor.
- Review Shipping Costs:
- Ensure the Default Shipping Price configured in the Vendor Module is applied correctly to the orders.
Recent Articles
-
4 months ago
-
4 months ago
-
4 months ago
-
4 months ago
-
4 months ago